

━━━━━━━━━━━━━━━━━━━━
Sheetrock done
Mudding done
Sanding done (mostly)
━━━━━━━━━━━━━━━━━━━━
The bathroom update is well under way! When we left off, the old wallpaper had been removed, new electrical was installed, and I had opened the wall over the sink and framed up the spot where a new recessed medicine cabinet will go! Now it was time to get the walls closed back up.

The Situation
Here's the thing - the electrician had to open up a number of holes in the bathroom walls to change the electrical lines around the way we wanted them. I get it - it's a necessary evil but...it sure left the walls a mess! Once again though, I got started on the repairs and really didn't take a lot of pictures so I'll just point our a couple things:

- A: The electrician had to cut a 4 to 5" high strip of sheetrock from the wall across the length of the sink wall and around the corner of the doo wall. This made it possible to feed the wire through the studs over to the switch just inside the bathroom door.
- B: I also had the electrician move the outlet on the right of the medicine cabinet well down to the same horizontal plane on the left side. This created a hole about 4'-5" wide and maybe 20" long.
No Matter how bad things are, you can always make things worse. At the same time, it is often within your power to make them better. - Randy Pausch
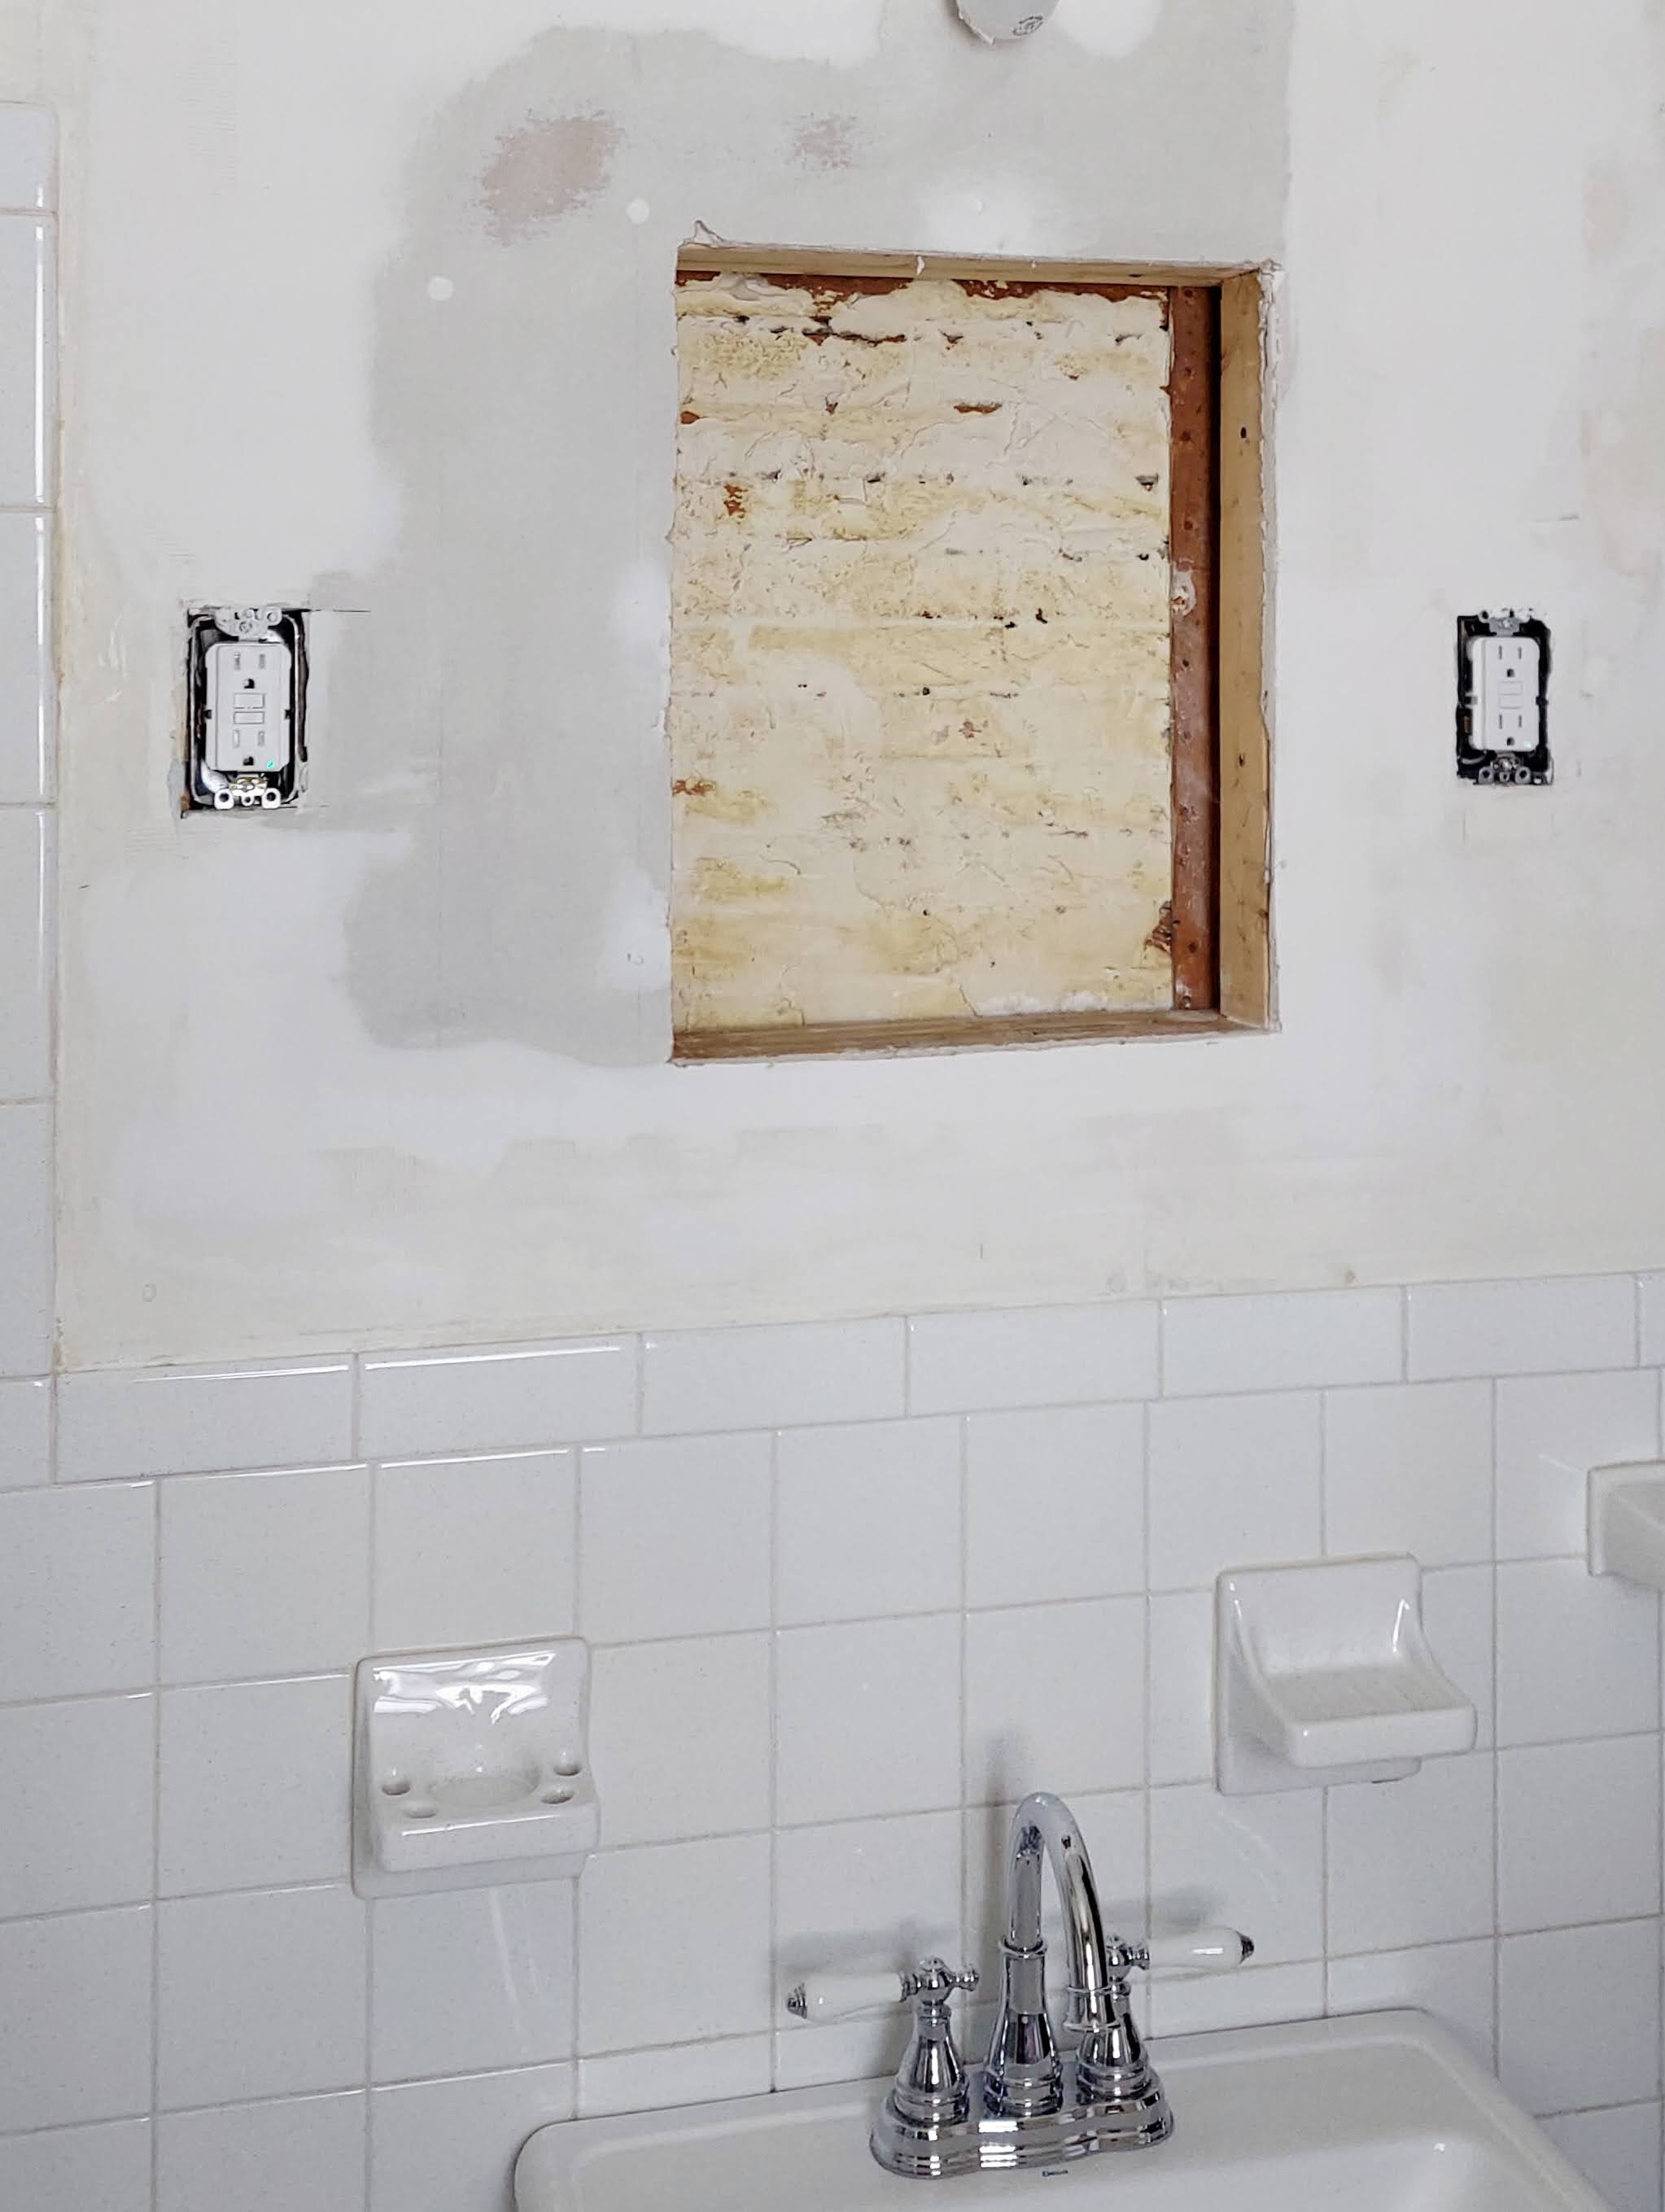
As you can see here, I had them repaired by the time of this picture:

Making It Worse To Make It Better
The holes to the right of the medicine cabinet were on the right side of the stud where the electrical outlet box was mounted. But on the left, there was some broken bits of sheet rock, leaving small sections that simply wouldn't be possible to repair.
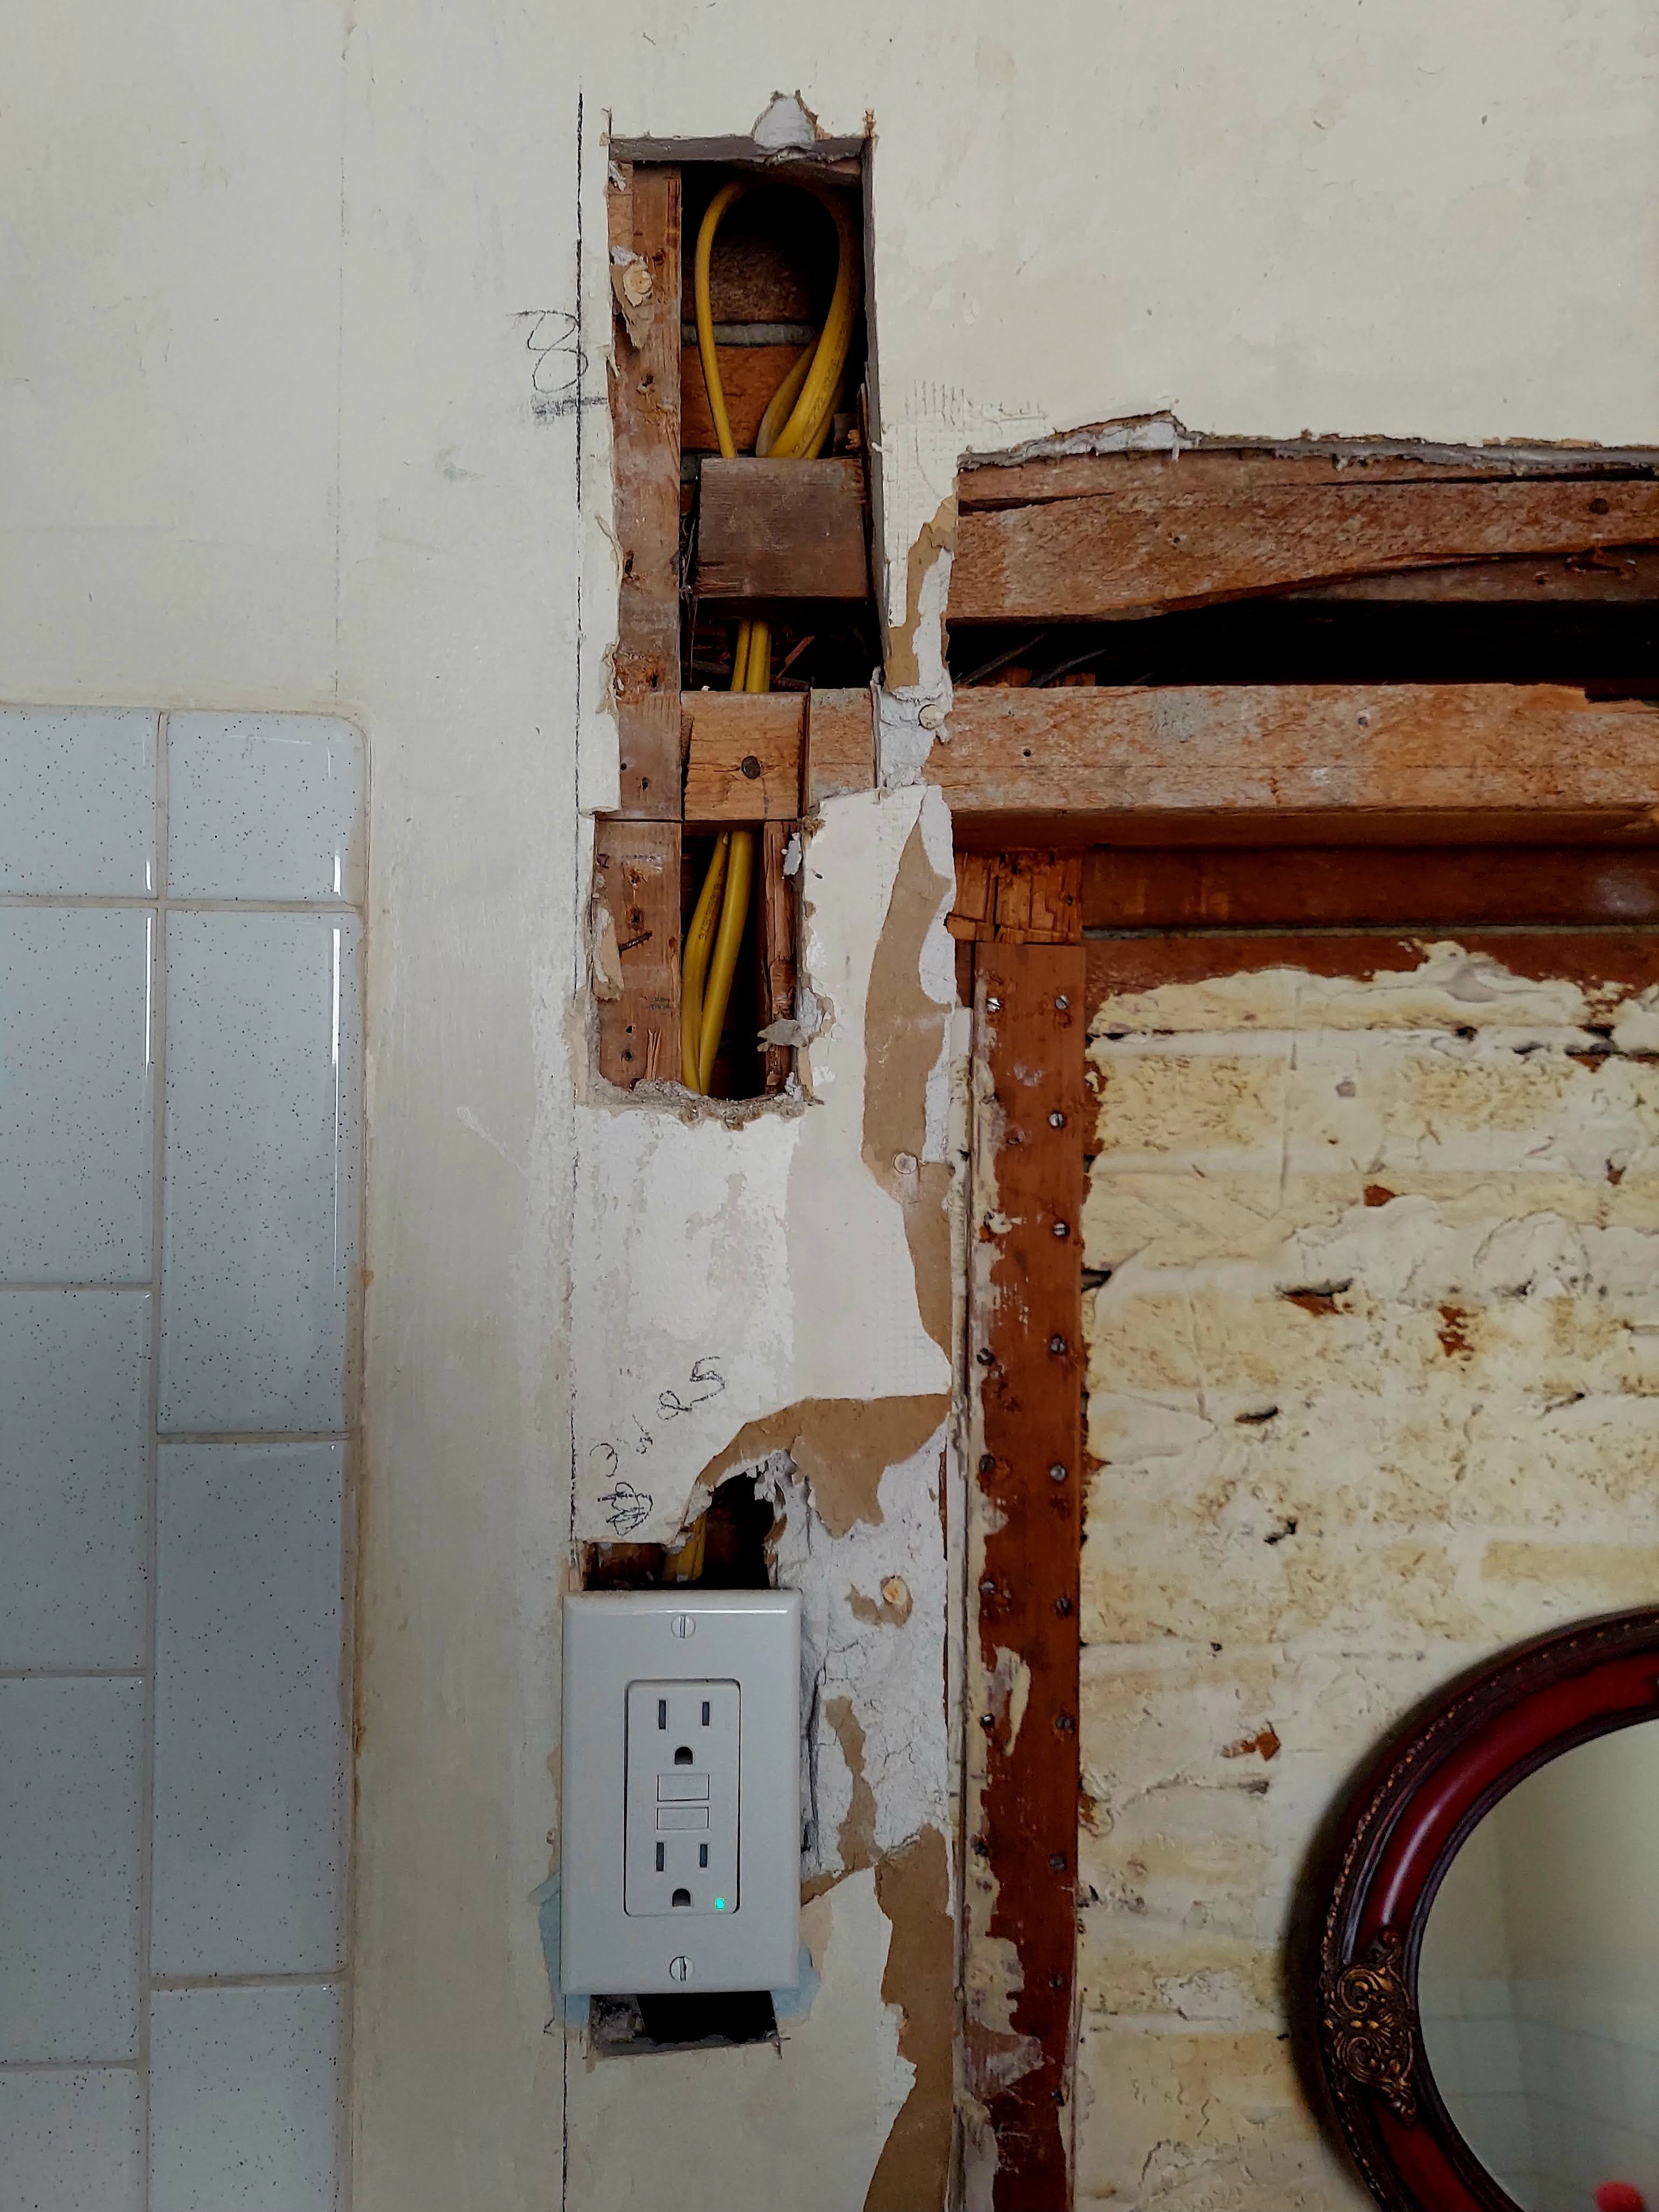
Removing those broken pieces revealed a hodge podge of construction going on that couldn't be seen until the wall was opened a bit more. And, after stepping back and thinking about it, the only real solution was to remove more sheetrock to make things neater and, quite frankly - easier...

Rockin', Muddin' & Sandin'
The electrician left me a good-sized piece of sheetrock, so a couple minutes of measuring, 2 or 3 swipes of the knife, and a few screws later, things were beginning to move along!

Then it was time for some joint compound.

Which I'm not very good at. So, I started with some light boats, which worked ok for that section to the right of the medicine cabinet well:

But, there were several places along the way where the new sheetrock didn't match up to the old wall, so I had to build up some areas. In some places - rather considerably. Sometimes the areas had to get a couple layers of mud and tape, all of which left a bit of mud mess:

But after only about an hour of sanding (and then about 2 of cleaning up) the whole area was smooth and ready to go!
On to the next bit - thanks for stopping by!
