

━━━━━━━━━━━━━━━━━━━━
First update since 2002 - good start!
First update since 2002 - good start!
Nice electric changes - outlets and lights
Lots of sheet rock repair needed
━━━━━━━━━━━━━━━━━━━━


━━━━━━━━━━━━━━━━━━━━
Over the last couple years I noticed that the wallpaper in the bathroom was starting to peel away a little at the seams. Then about a month or so ago my sister was having her bathroom completely remodeled to the point that now it looks pretty much like something you see on Hometown or in some swanky hotel. Wel, l 173 doesn't really need that level of. But when I start looking at my old book where I tracked house remodel and updates in projects and also took a look through the blog it dawned on me that the last major makeover of the bathroom was back in 2002, some 20 years ago now! It's time for a makeover - let's get into it!

Looking Back
Before we get into the makeover I just want to take a quick look back and remember where we were coming from with the bathroom when for the first makeover. This is a really bad picture taken after we'd been living at 173 for a few years, but it does show the original wallpaper that we ended up replacing in the first makeover.

This next picture is a kind of a close up of a sample of the old wallpaper. I kept for that book I talked about earlier in which we tracked all our projects and the like. As you can see in this picture it's a little old fashioned and probably a little staid. There was nothing wrong with it, it was just dated. The design was blue on white.

And here's a picture of one angle of the bathroom when we were mid-makeover back in '02. The Moshers had painted the window and door casings. It should be noted that the bathroom and the kitchen are the only places where the Moshers had painted the wood, and the woodwork throughout the rest of the house is the original old-growth chestnut from back in the day before the chestnut blight.

The chestnut blight was accidentally introduced to North America around 1904 when Cryphonectria parasitica was introduced into the United States from East Asia when Japanese chestnut trees imported for commercial purposes. It was first found in the chestnut trees on the grounds of the Bronx Zoo by Herman W. Merkel, a forester at the zoo. By 1940, most mature American chestnut trees had been wiped out by the disease. - American Chestnut: The Life, Death, and Rebirth of a Perfect Tree, Susan Freinkel, 2009
The Old Wallpaper
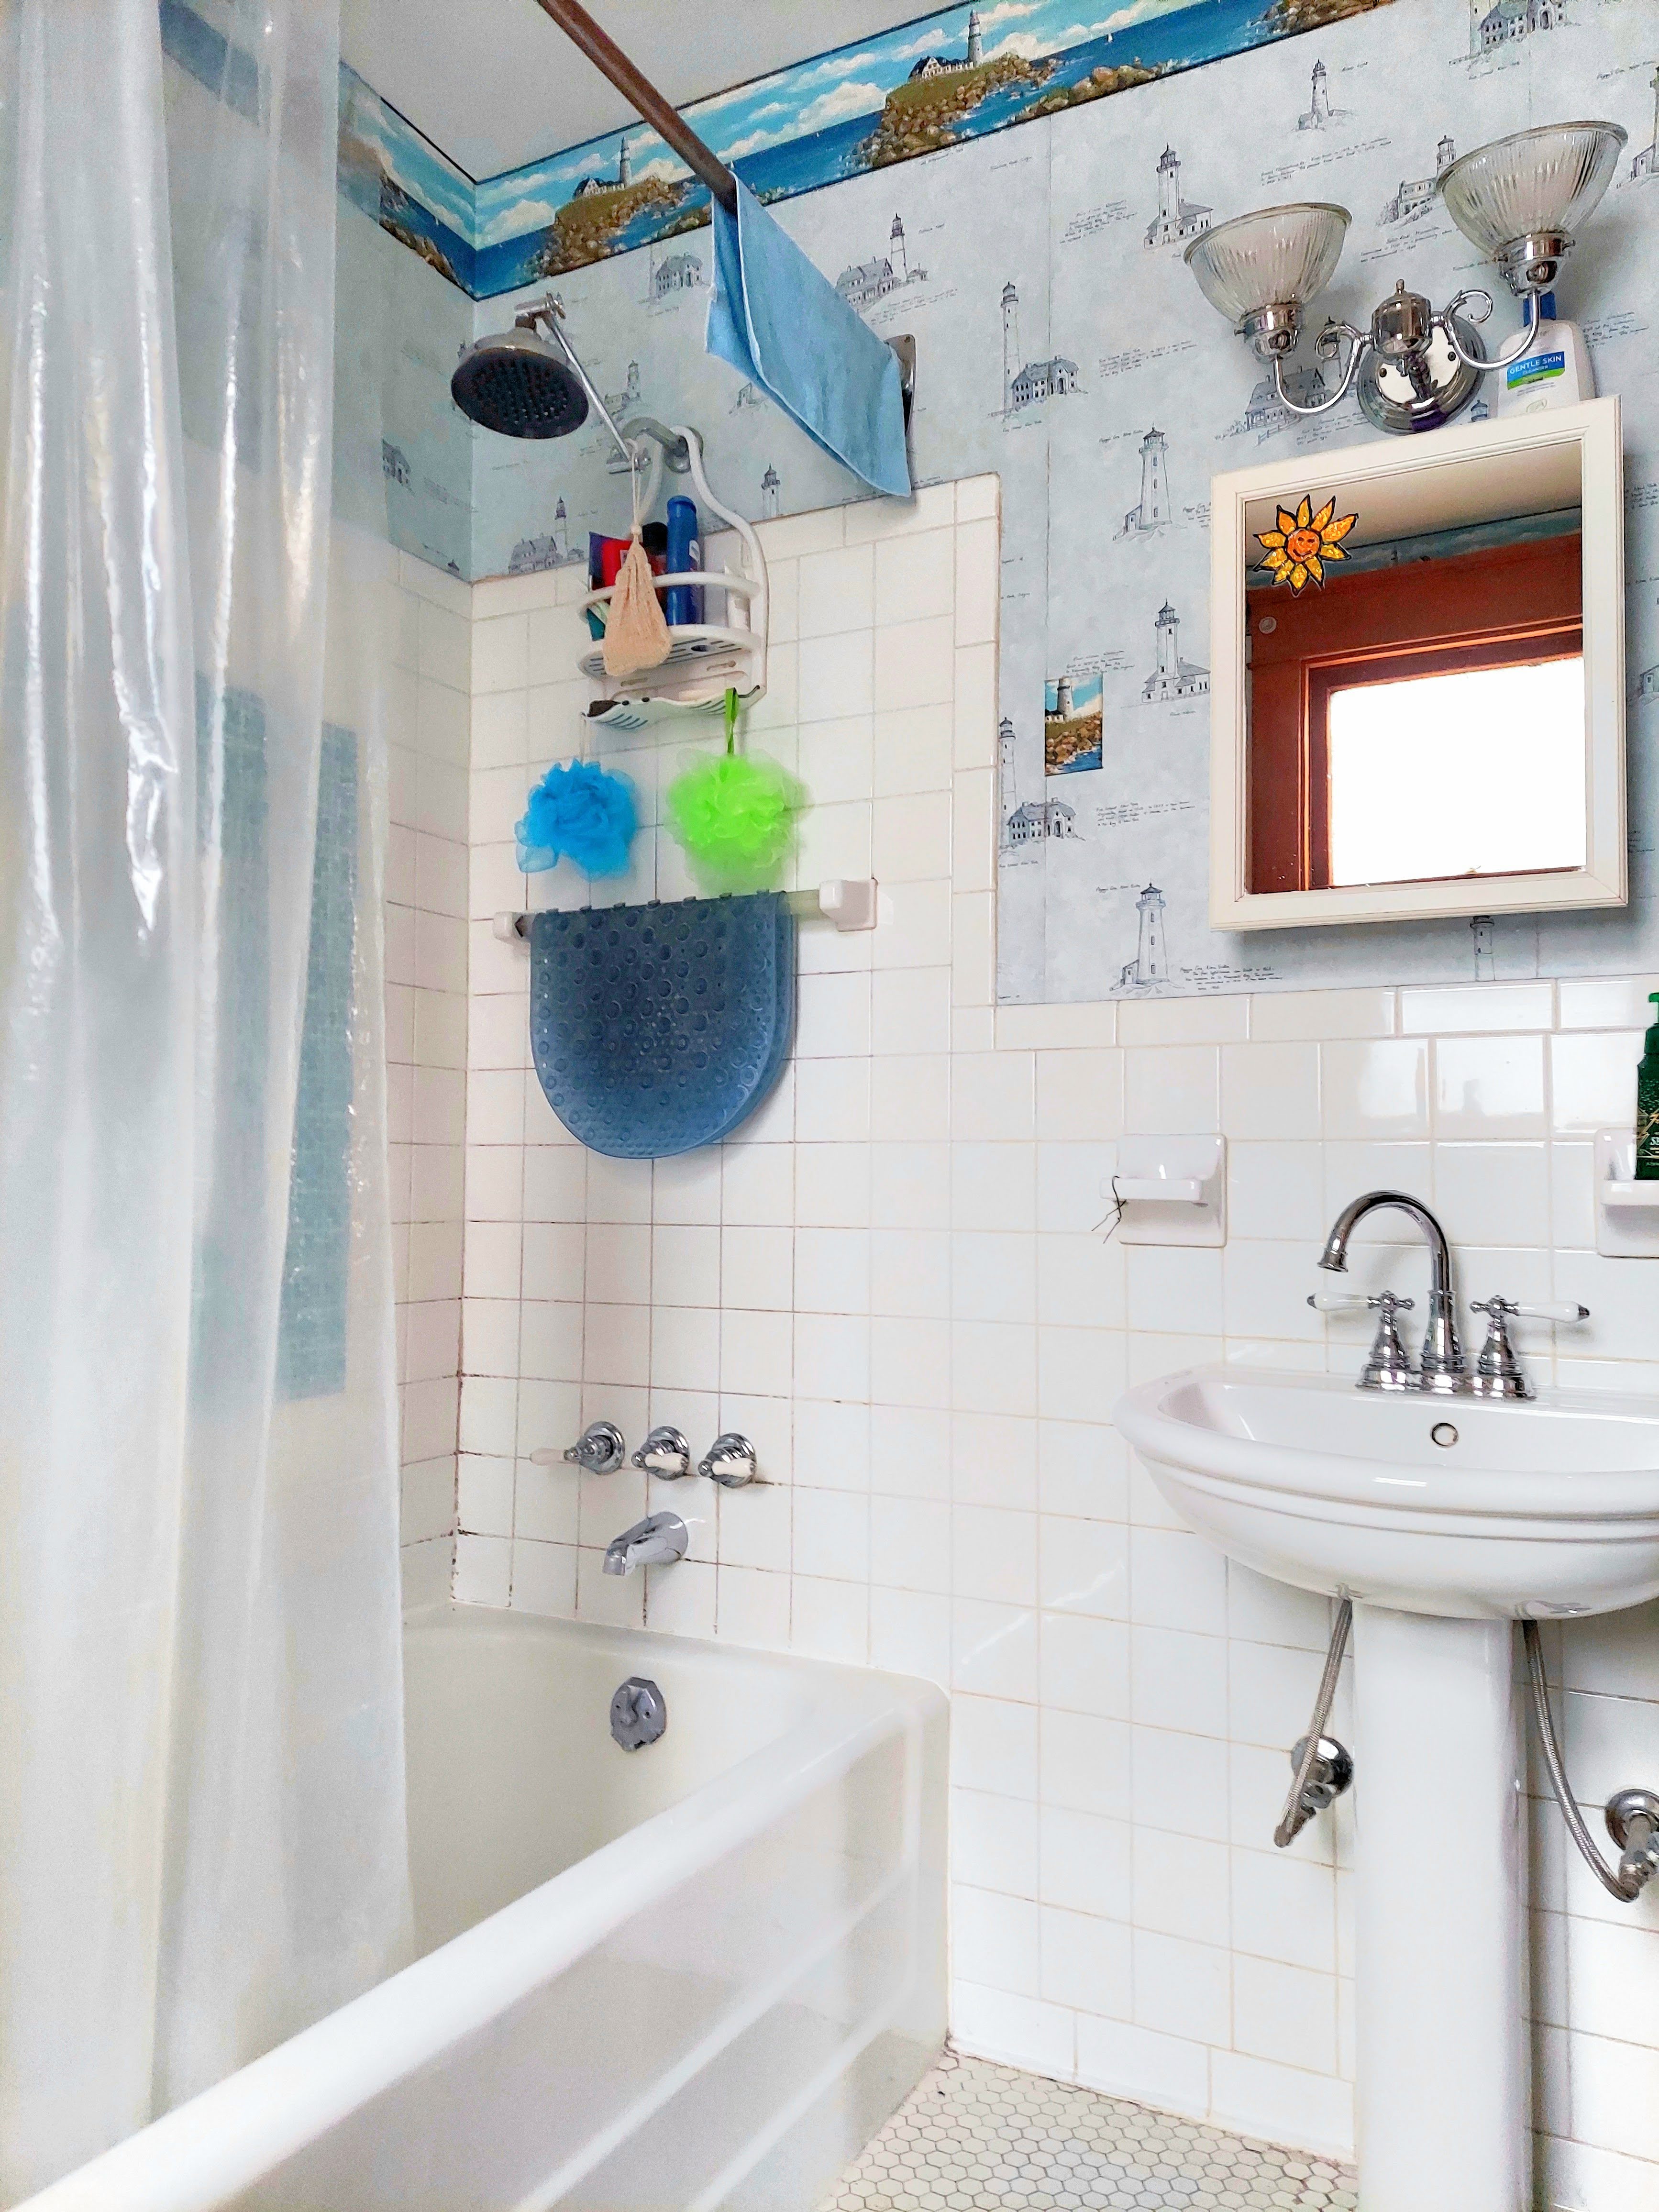
As you can see in this next picture, in our original make over of the bathroom we went with a lighthouse theme which seemed kinda stylish at the time. We even went so far as to pick up some knickknacks and gewgaws at the Christmas Tree Shop.
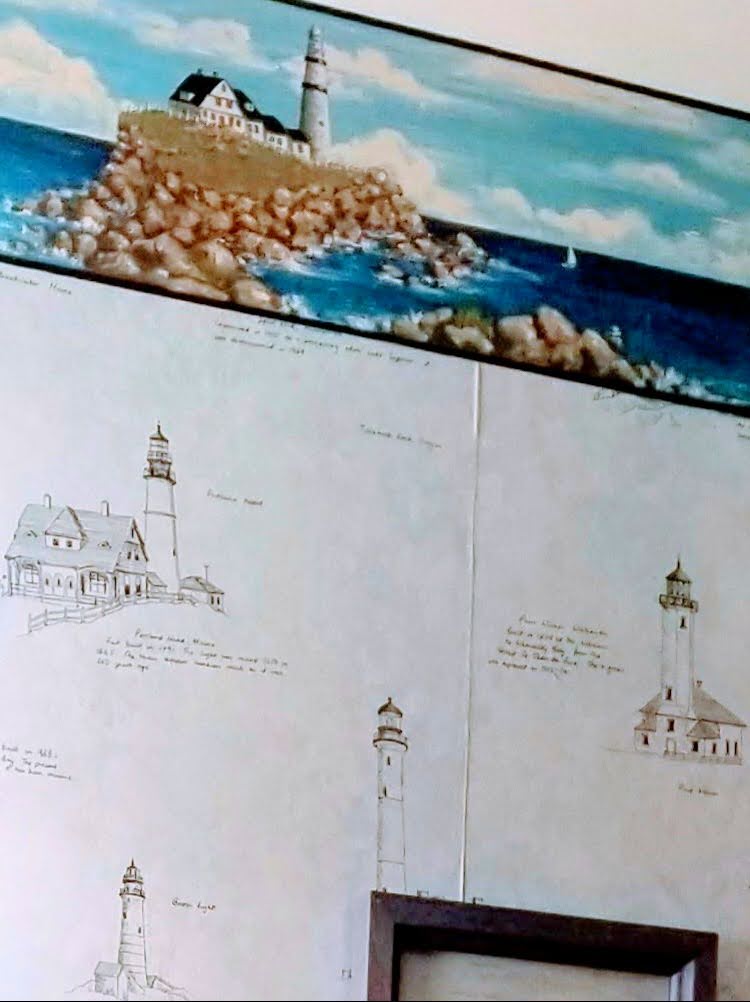
It turned out to be a cute little bathroom, like I said maybe stylish at the time back in 2002 but now it just seems a little cluttery and just needed an update. So here we go.

The best measure of a man's honesty isn't his income tax return. It's the zero adjust on his bathroom scale. - Arthur C. Clarke
Wallpaper Removal
Well after 20 plus years of hanging on the wall, it was time for the wallpaper to come down. I bought a steam machine that the loosens the wallpaper and that worked well. But we found that just using one of those perforating rollers and some wallpaper glue remover actually worked not only faster but a lot cleaner than using the steam machine. A couple days later, the '02 wallpaper was gone!

Opening Up the Wall
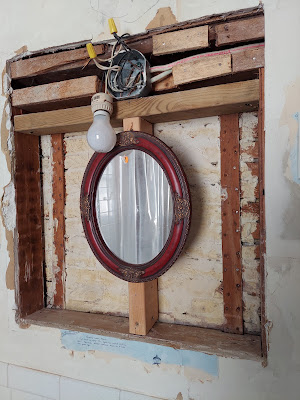
With the makeover of '02 I removed the old, partially rusted recessed medicine cabinet and sheet-rocked over the opening so a surface-mounted cabinet could be hung. I don't remember why the surface-mounted was chosen - either I didn't have the skillset to install a new one back then, or it was some wistful thought of the aesthetic.

And it turns out that picture also gives you a good view of the outlet to the right and that odd box with a couple wires on the left. You can see how they weren't even nearly on the same horizontal plane. No idea why! Nonetheless, the wall had to be reopened for two reasons:
- A recessed medicine cabinet is the order of the day!
- Electrical work needed to be done.

A little wider view for context...

Electric Updates
The next step was to update some of the electricity in the bathroom. Like the rest of 173, the bathroom was wired kinda oddly. We had a switch inside the door like in most rooms in just about every house. The problem was that the switch worked the light above the medicine cabinet and an outlet next to the medicine cabinet. So, when you turn off the switch to turn off the light that also turned off the outlet.
We like to plug in the electric toothbrush but again, if you turn off the light using the switch then the power will be off and for obvious reasons would not charge said toothbrush. When we did the bathroom update back in 2002, we had to search for and install a bathroom light fixture that actually had a twist style switch on the lamp so we'd be able to turn the light on and off without using the switch. I know this doesn't sound like much but it just always bothered us there and couldn't just walk into the bathroom and turn on the light. Well it was time to get that fixed.
So, if you take a look at the picture there's a box cover to the left of the medicine cabinet. When you open that it just have some wires tied together. I have no idea where that electricity went to so when I started studying how to make the switch work separate from the outlet, it became immediately clear that this was way more complicated than anything I was really capable of doing. So we hired an electrician.

There were a few things we wanted the electrician to do:
- Make the wall switch work the light over the sink
- Make the outlet on the right have power at all times
- Put an outlet in that box to the left of the sink
- Put both outlets on the same horizontal plane
- Raise the light box over the sink about 12"

The electrician was here for about 7 hours at a cost of $1,600. A bit pricey, but we have the electricity in the bathroom the way we want it, and have wanted it, at long last! But...to make all that happen, the electrician had to do some considerable opening of the wall as you can tell by those pictures above. But before I could fix all that sheetrock, I needed to frame the large opening for a recessed medicine cabinet.
Framing For The New Medicine Cabinet
Before framing up for a new medicine cabinet, a new one had to be chosen. Even with the opening for the old recessed cabinet already there, there were some structural problems that limited the size of the new cabinet. That's okay though, after a couple days of shopping, we found a very nice cabinet while not as large as we wanted, it was considerably larger that the old one. Cabinet in hand, it was time to build the framing.
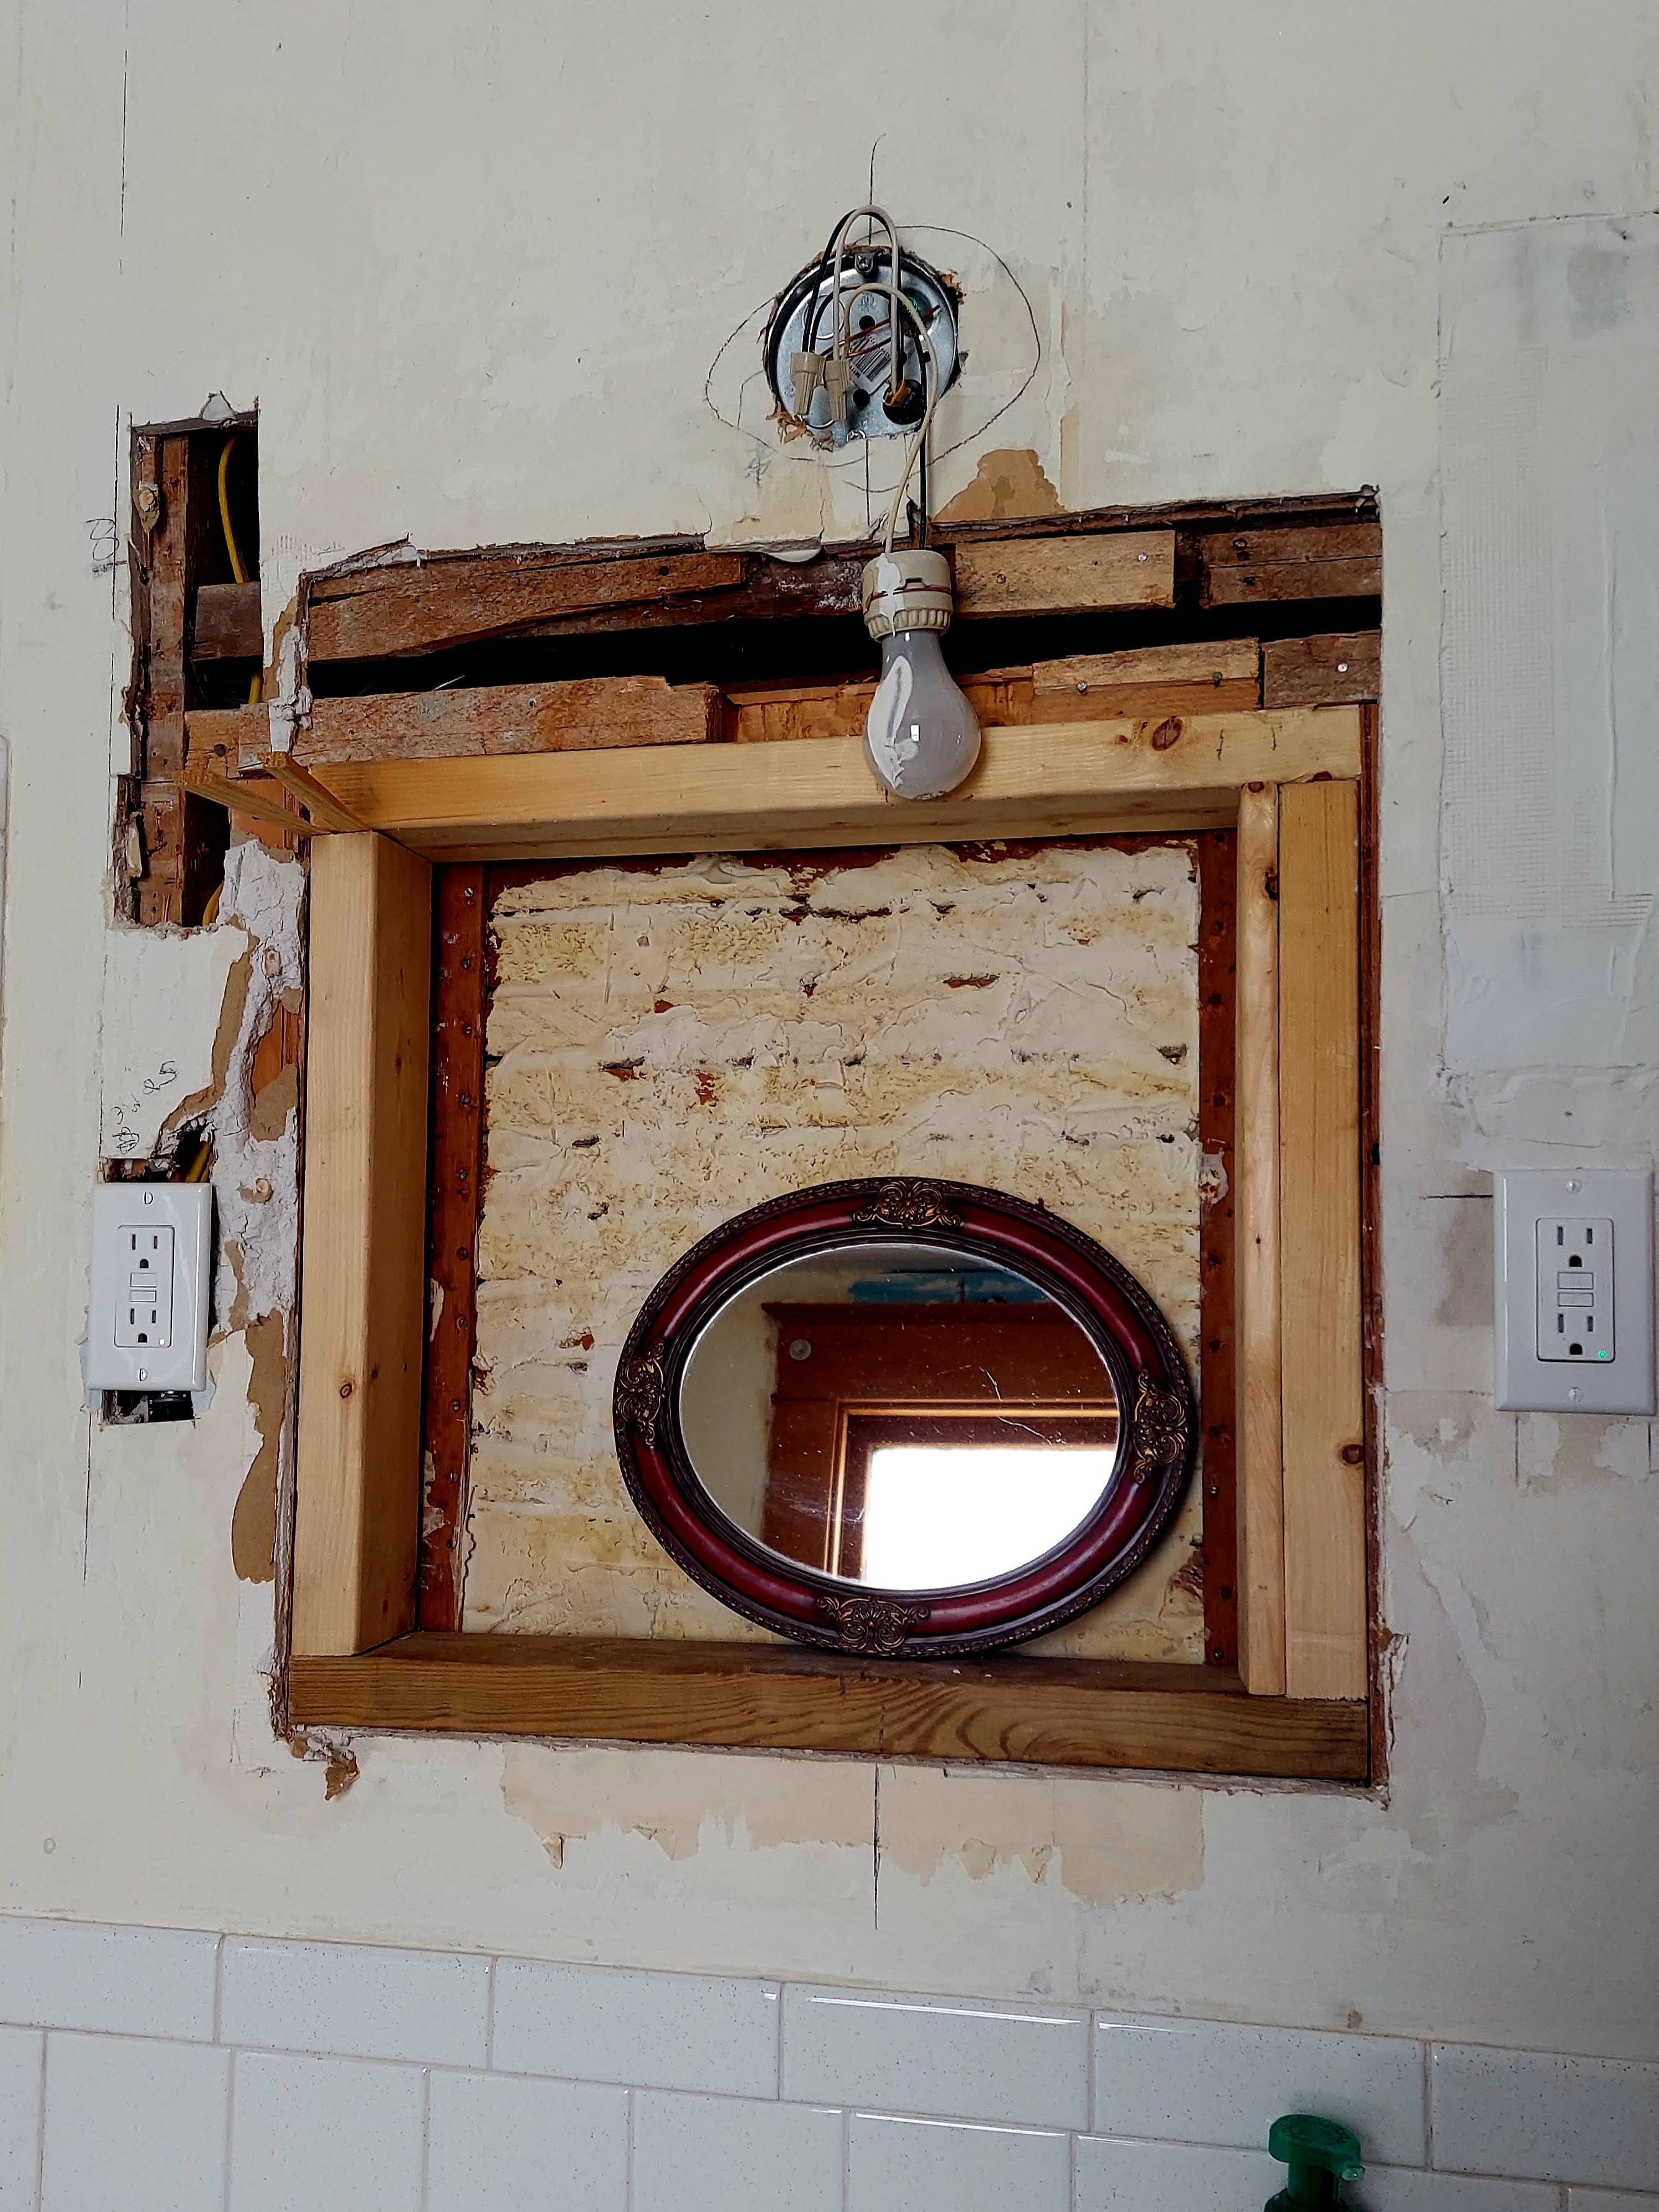
Like the little mirror used as a temporary solution? I think it was a $3 yard sale find a few years ago.

And There's Part 1
There we have it the bathroom update and refresh is well under way. The next steps are going to be fixing the sheep rock on the wall of the where the sink is and finishing prepping the walls. After that there's a little bit of grouting that needs to be done in the tile in the shower. After that it'll be time to paint the ceiling and then hang the wallpaper and then it's odds and ends. I'm thinking it's still gonna be a while but we're well underway now.
Thanks for stopping by and we'll see you next time!