

Vintage Tools
━━━━━━━━━━━━━━━━━━━━
VINTAGE 14" RIGID
SUFFICIENT EVIDENCE
MADE BY 1948
━━━━━━━━━━━━━━━━━━━━
This will be a quick post... quick restoration quick post I suppose. And this was definitely a quick one, probably clocking out at about an hour of work in total. And let's be clear here kids - that hour was spread out over the course of a few weeks! If ya can't laugh at yourself...

A Gift from Dad
This is one of the tools I inherited from Dad late last summer. I keep thinking I should write about that, but I still can't bring myself to do it. It'll come at the right time. Nonetheless, it was time to clean this beautiful junk of steel!

A History
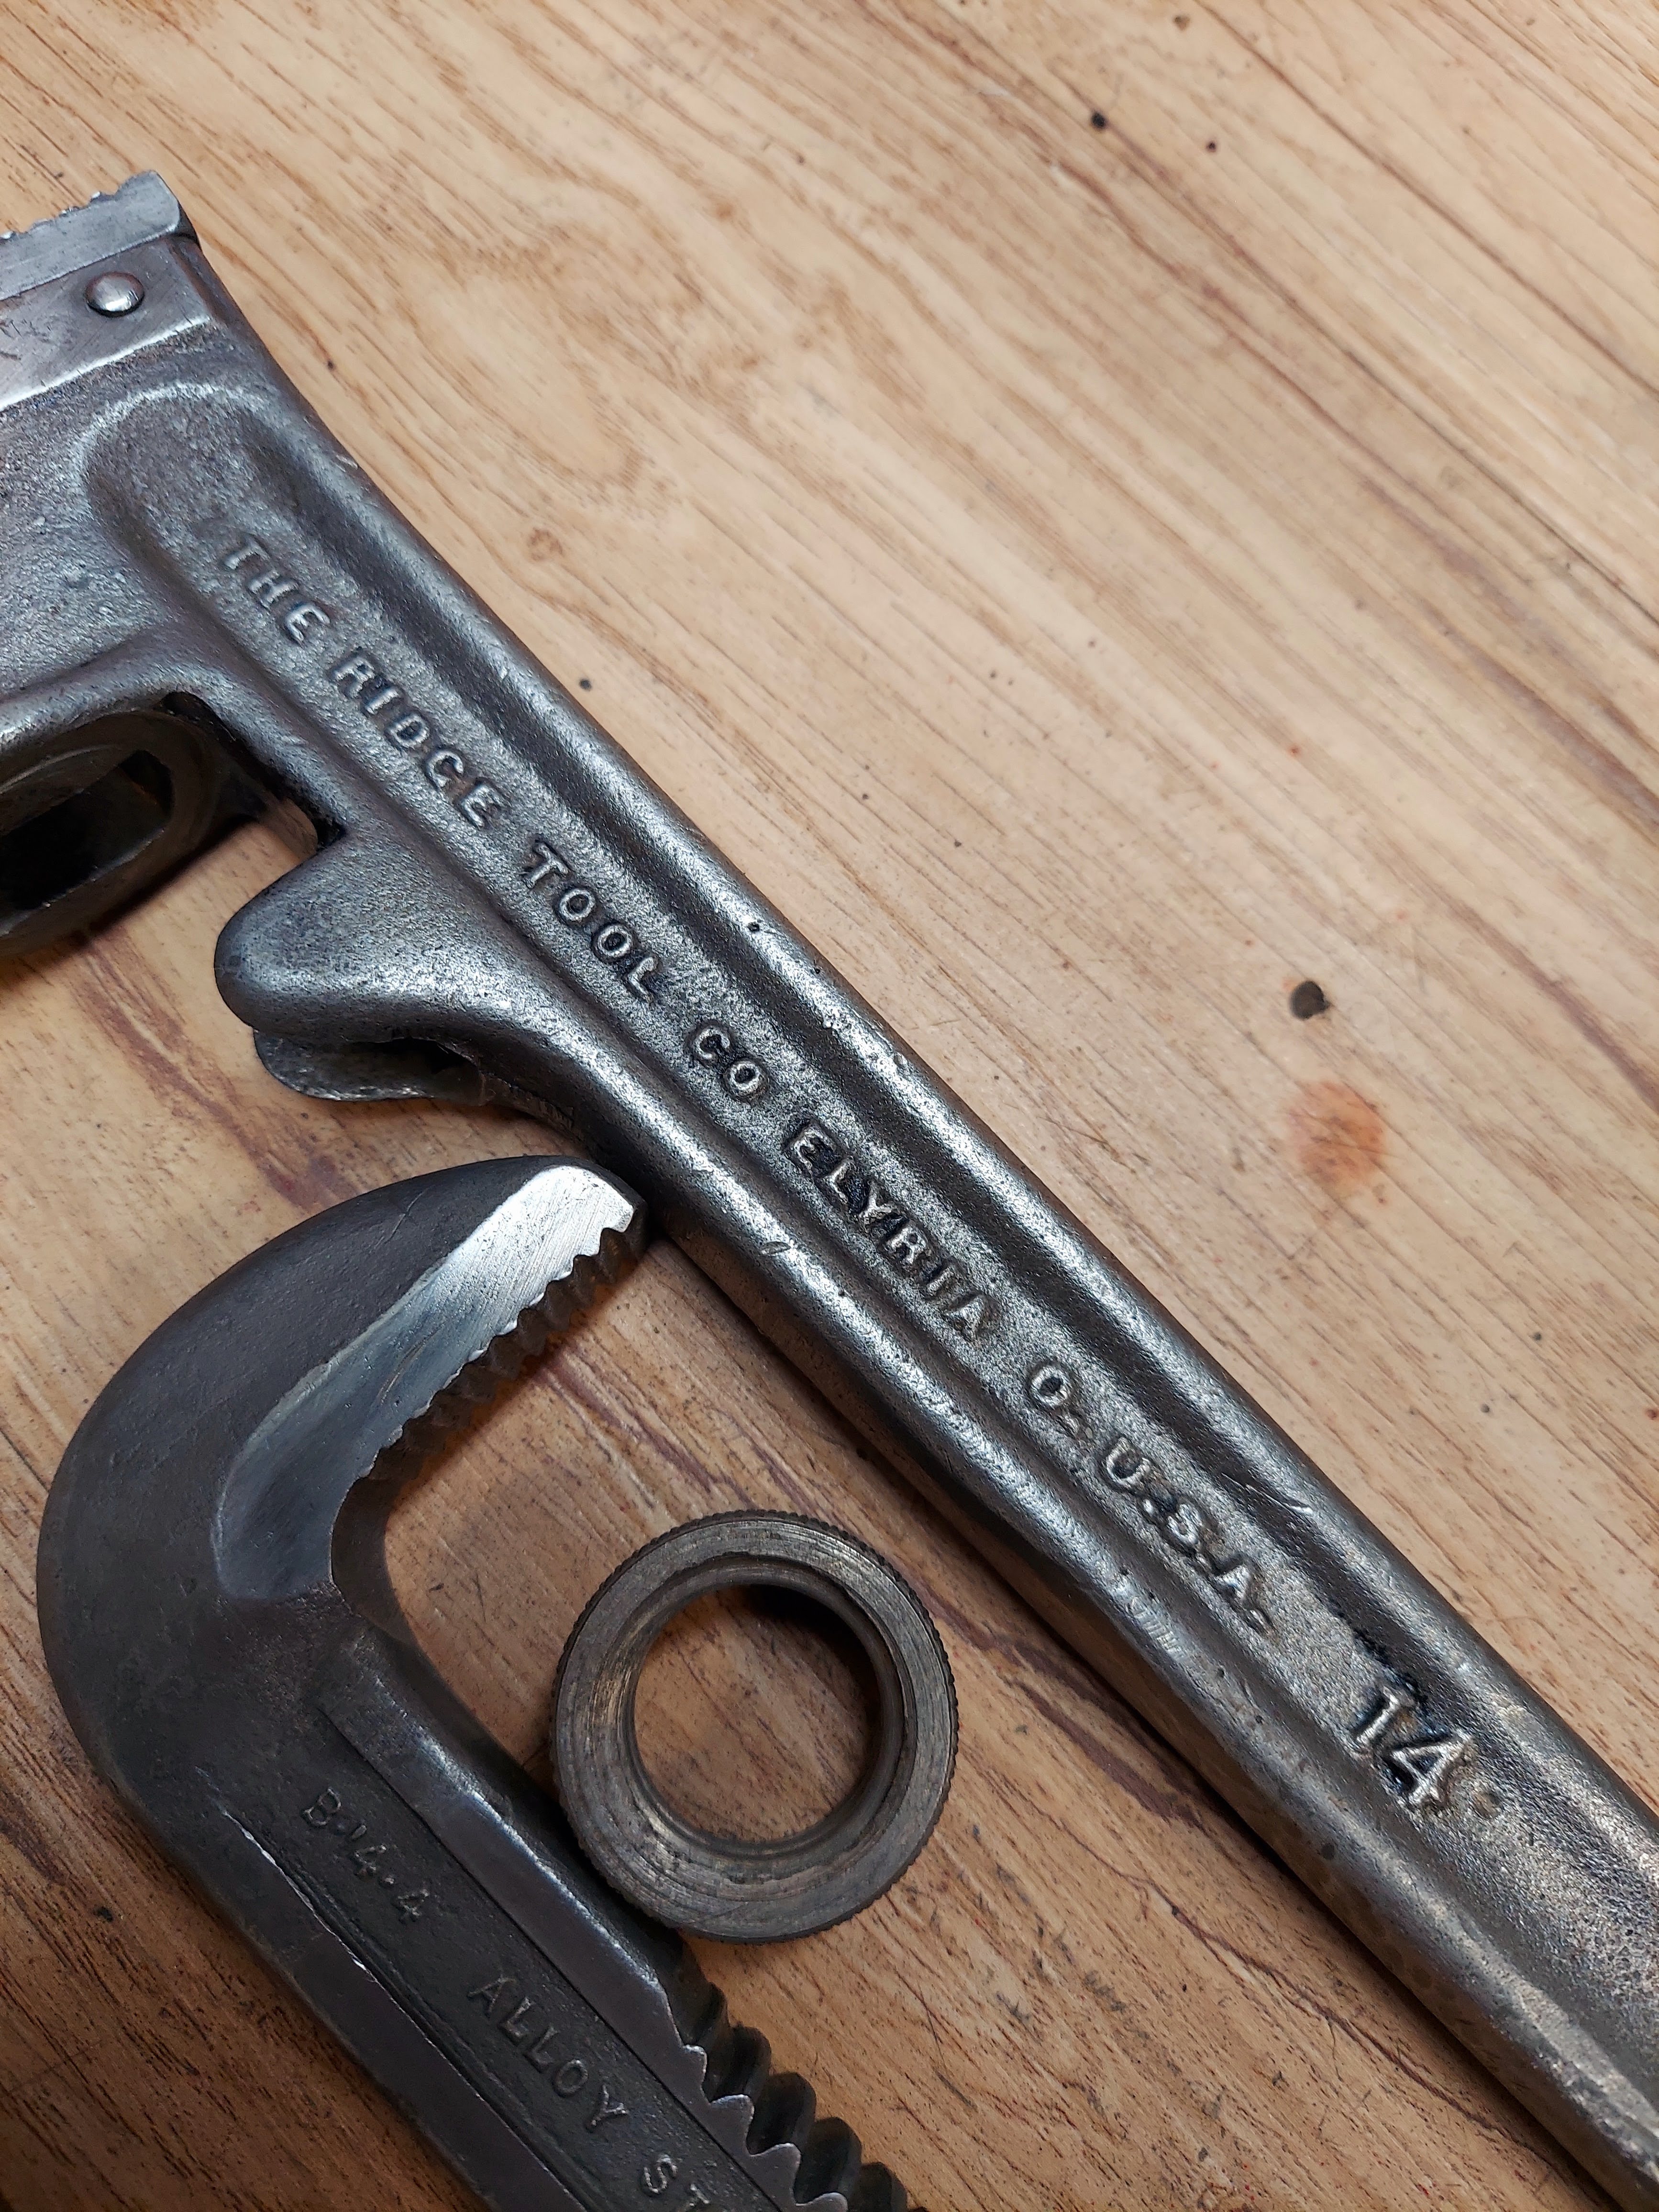
Dad's pipe wrench is a Rigid brand wrench. If that sounds familiar it's because Rigid is kinda the house brand at Home Depot. I always thought it was just a name Home Depot made up, but it turns out Rigid long predates Home Depot.

From Katy on the Toolstop website: "The pipe wrench has essentially two components based on the Ridge Tool Company redesign in the 1920s; the housing with the heel jaw and the hook jaw. Rigid pipe wrenches benefit from the housing (basically the handle) and the heel jaw being one-piece construction. That makes it a very strong tool."

Also, "the housing is made out of malleable iron, the beauty of which is that it'll bend before it’ll snap. That means if you’re putting too much pressure on the wrench, it’ll bend, alerting you to the fact that you need to ease off! And then we have the hook jaw.

This is the part of the wrench you use the thumb wheel to adjust to the size of pipe you’re working on. It’s made from forged alloy steel and the shank is quenched and tempered which makes it incredibly tough. The teeth on the jaw are induction hardened to help them resist wearing down."
And It was Made By 1948!
One of the fun parts of the tool restoration (and collection) hobby is trying to date an old tool. But, as luck would have it, there seems to have been some great interest in the history of Rigid pipe wrenches, so it was pretty easy putting a date to dad's wrench. There's a thread on the Garage Journal website that pretty clearly spells it out:
Here's how Private Lugnutz spells it out: The earliest RIDGID pipe wrench has no stabilizer behind the adjusting nut (1), no trapezoidal swash plate on the housing (2), and no patent, 1,552,091, forged into the handle, which reads "PAT PEND'G" (3) instead. No RIDGID pipe wrenches have ever been found with the 1,552,091 patent. These can be dated to at least 9/1/1925, possibly earlier, if Ridge made them before the patent was granted.

The next generation (Dad's wrench) RIDGID pipe wrench has the stabilizer (4) and the angular swash plate (9), but no longer reads "PAT PEND'G" on the handle (6). That suggests that the second patent (1,727,623) had been granted by the time this wrench was made. Also the adjusting nut was knurled but didn't have a ring in the middle of it.
Inviting people to laugh with you while you are laughing at yourself is a good thing to do. You may be a fool but you're the fool in charge. - Carl Reiner in "My Anecdotal Life: A Memoir"
All that said, I calculate dad's wrench to be from 1948 although it could apparently be from as early as 1937 too. Either way - it's old!
Time for Restoration!
Before I get into the restoration itself, it might be helpful to present a little pipe wrench anatomy lesson. Of course this for a tool one, maybe two parts more complicated than a hammer or screwdriver!

All in all, I suppose it took 15, maybe 20 minutes at the wire wheel on the bench grinder and a few minutes with the rotary tool to get 75 years of dirt, grime and rust off the wrench. And just like that - it was ready to paint!

Cold Bluing
When I started to plan out the painting, I low-key stressed for a little while over how to paint the hook jaw. I wanted it black, but knew paint just wouldn't hold up to being run through the adjustment nut. Then I remembered seeing Scoutcrafter do some cold bluing and thought I'd give that a try! Here's his video:
Because Scoutcrafter used Brownell's Oxpho-Blue with great success, I thought I'd try the same product. I gotta tell ya' - this stuff was simple to use and blued the hook jaw just as I envisioned it. This was encouraging because I have some other tools that will need the same process!

Painting - Home Depot Orange?
When dad gave me this wrench I didn't think much of other than it was old, it was a tool and it was dad's - all good enough for me! And back then, restoring old tools wasn't even on my radar. But last week, when I took a close look at it I noticed it was a Rigid! And that's when all the research began.

But in spite of Rigid tools being orange, and after already painting a Rigid pipe wrench orange, I decided to paint this one 173's signature red! So I hung the wrench from the joists...
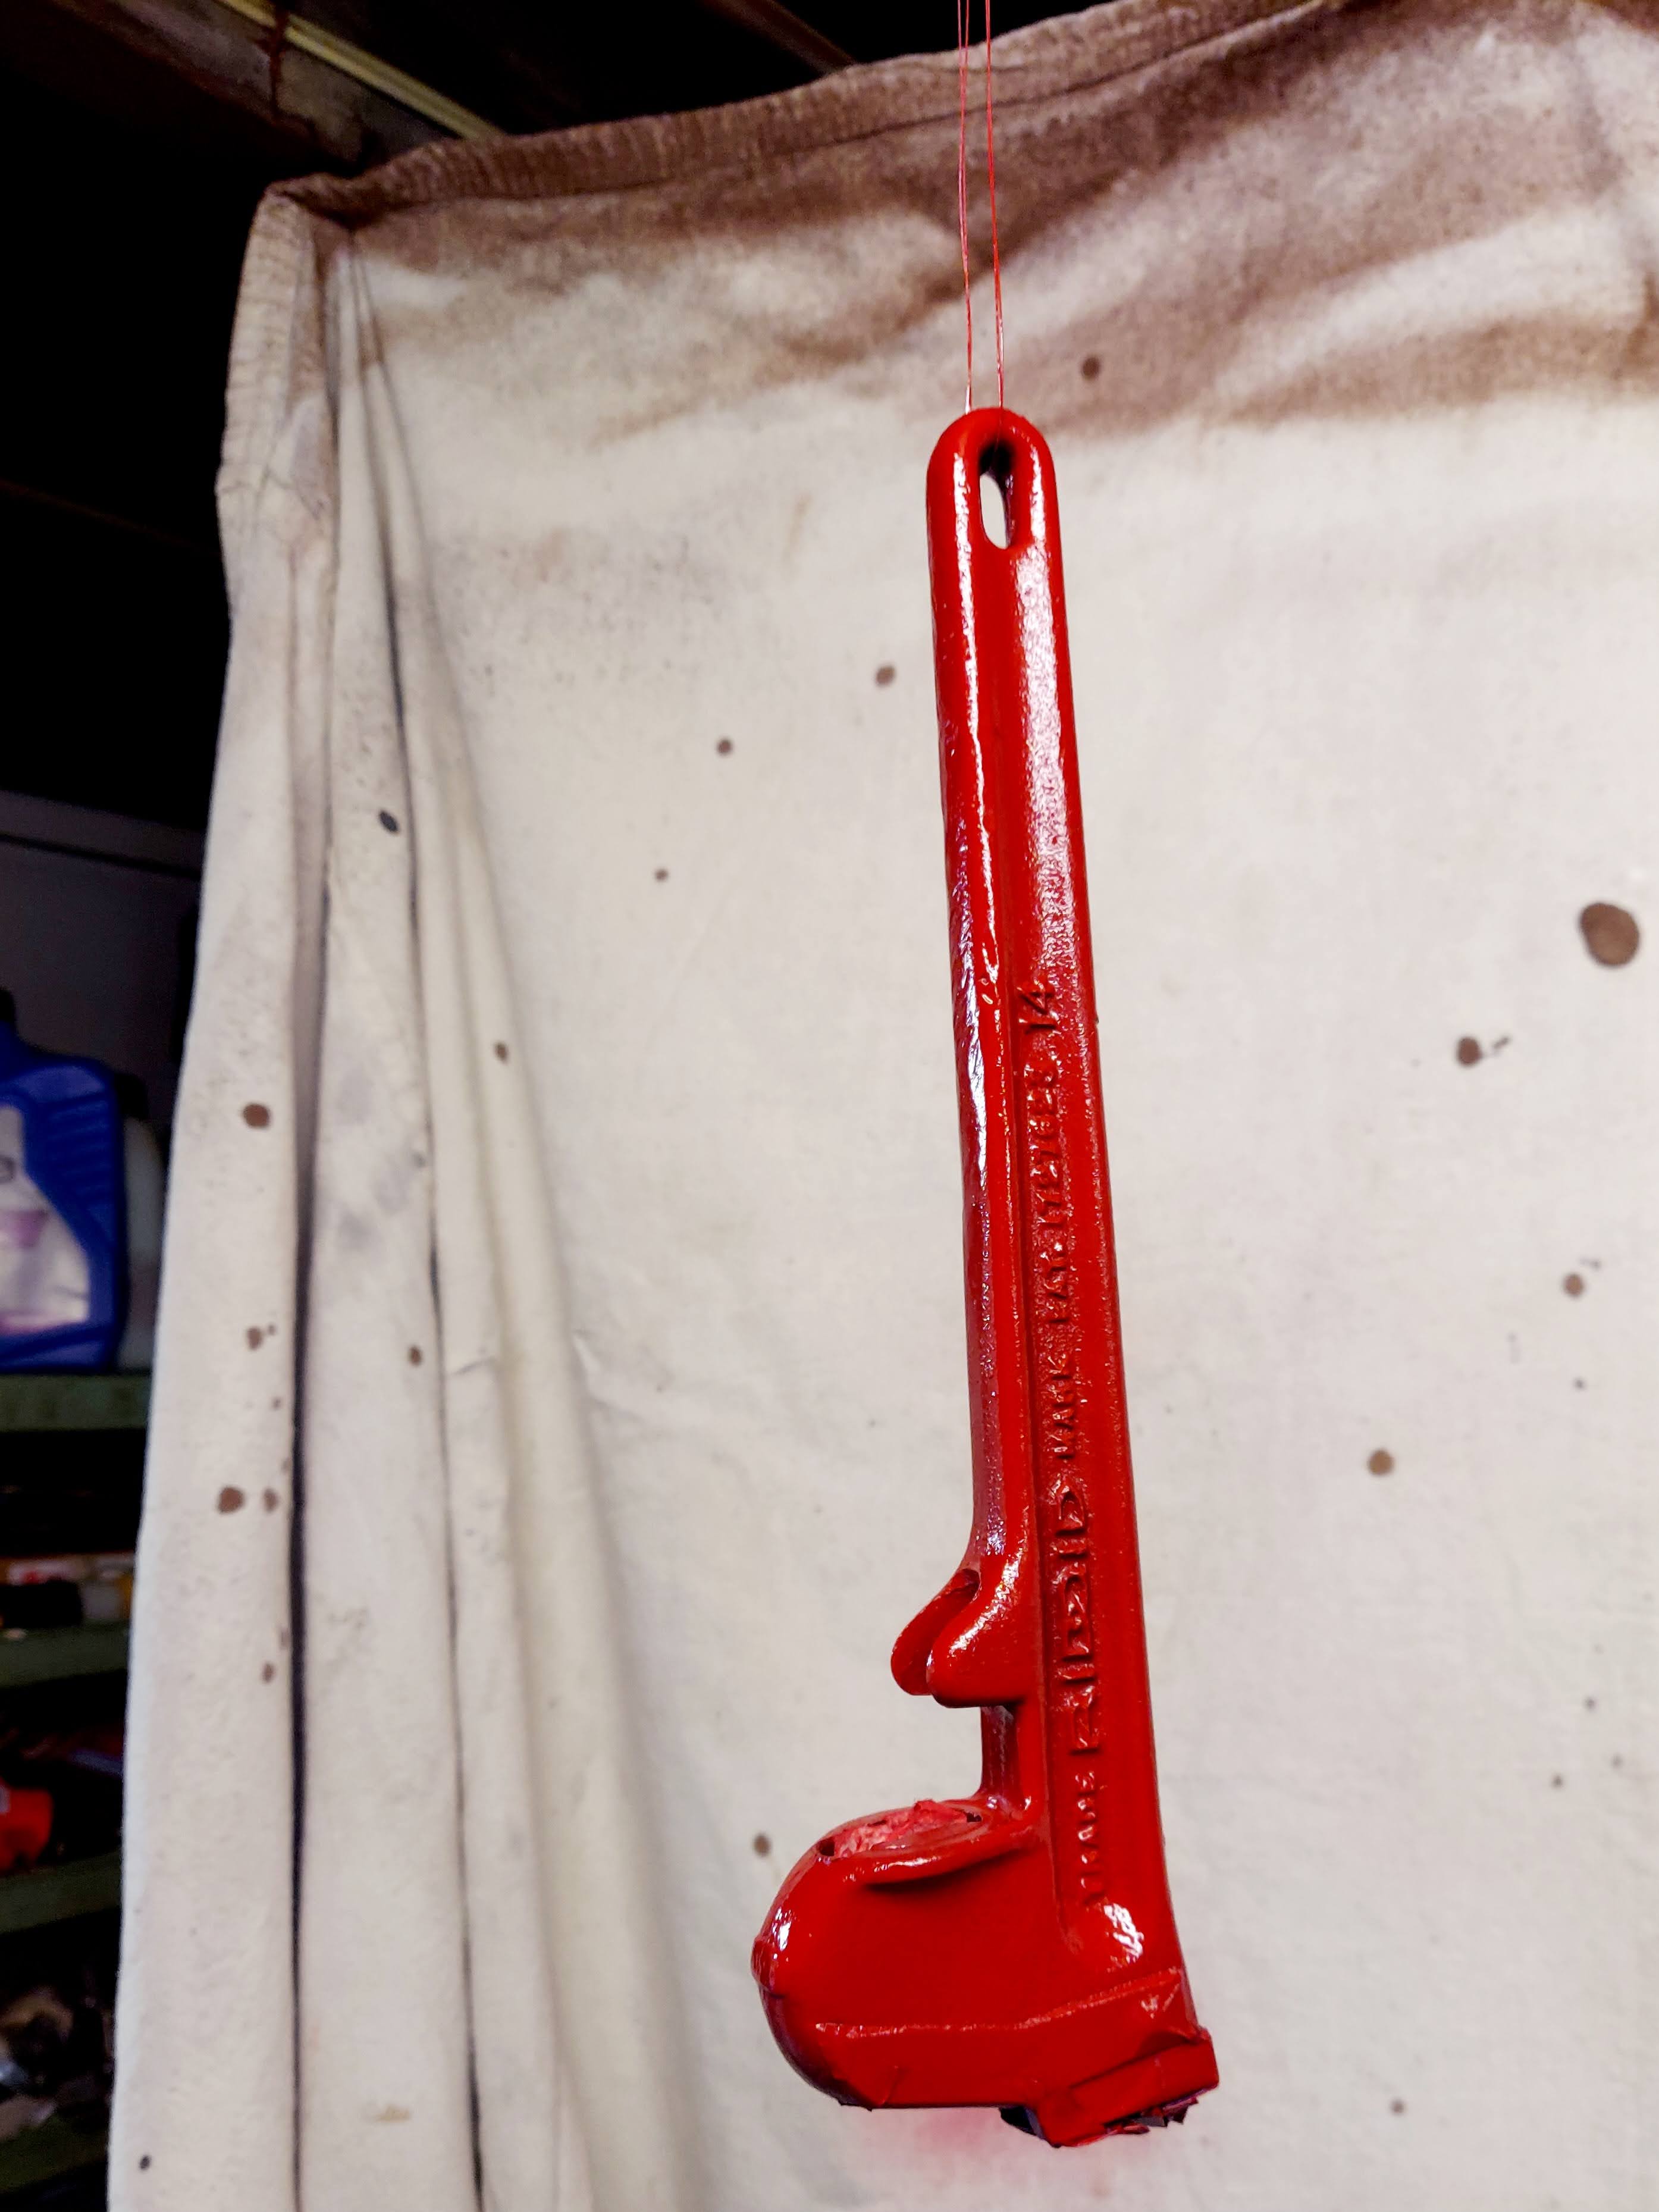
And went at it with some Krylon Gloss Cherry Red paint!

Finished!
And just like that - it was done! Dad's, now my, 1948 Rigid 14" pipe wrench looked about as new as it has in some 75 years!


And a little before and after:

Another tool restoration in the bag. And with that - thanks for stopping by!
