

New Lights and Tool Racks
So, here we are - the first month of the new year has already zipped on by, and February is well under way. I have a new vintage tool restoration happening on the bench, but I also made a change in the shop in the last week, so I thought I'd write a quick post just to catalog the change. You know - posterity and all...
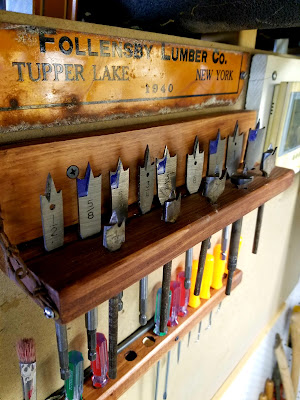
The Paddle Bit Rack
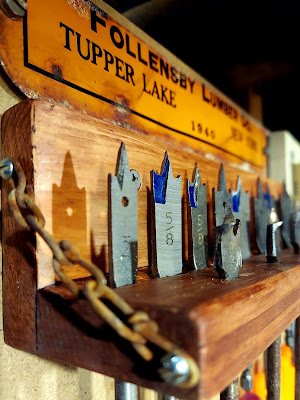
Let me start with this little scrap wood piece I put together a couple months ago. I'm not sure why it didn't make it into a post before this but then - who cares, it's here now! It all started when I looked through the Lowes drill bit set my sister's beau gave me for Christmas a couple years ago. You know, one of those hundred piece cases with all kinds of parts- always handy to have on hand. Well, the kit included a set of paddle bits to drill holes up to about an inch-and-a-half I think.

The only problem is, when it comes to small things like these bits, I often forget about them until after I've bought a new bit for whatever project I was working on. So, one day I decided to just make something I could mount on the wall. Of course it would need to be made at no cost because to do otherwise would be just plain silly. If you think about it, this should be of the simplest design because it's just going to hold a few drill bits. So I marked the layout (notice I used the Made at 173 Marking Gauge)...
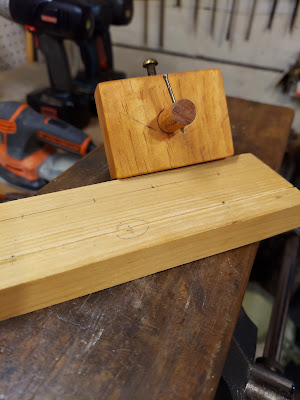
...spent a couple minutes at the drill press, then added a back. I added the back because after drilling the holes and putting in the bits, it felt a little heavy in the hand so I wanted to have a good spot to affix the rack to the wall rather than pocket screws like I did with the Nut Driver Rack. Should have been good enough right? Well, unsurprisingly, I overthought the entire simple project and thought - I don't want the weight of the bits to pull the rack apart so - I think I'll add a support chain. A support chain, which you shall see shortly, makes no sense and probably very little support.
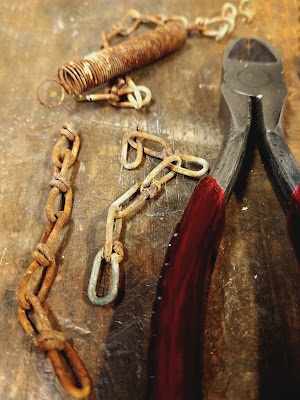
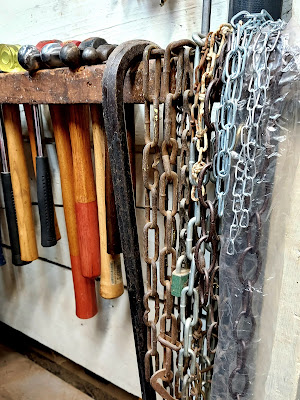
Whenever I come across a length of chain I keep it, cuz, ya never know when you'll need a length of chain. I store them on the hammer rack - just seemed like as good a spot as any.
Seems silly, but bits of chain have helped in several projects over the years, although can't think of a single one of them! Anyway, I like the look of the chain on the rack, and a little stain and a coat of shellac later...
...the rack was mounted and the paddle bits have found their natural habitat, which I'll show you in a few minutes, unless you're one of those speed readers, in which case you've long since passed this sentence!
A Little Segue
Ya' know, I gotta tell you I love my workshop. It started as a dark, damp, nearly dirt-floored basement room where I built a rickety 16 inch wide, 5 foot long workbench out of a few pieces of unevenly sized angle iron, a couple pieces of thin plywood and some 1 x 3 boards. Now, it's a great little shop, my man cave if you will. But...I'll never stop being a little jealous of dad's shop! It's huge! I mean, it's big enough that there's a garage attached to it. That's right - it's not in the garage, it's not attached to the garage, no - the garage is attached to it! I don't have a great picture of it right now, but sometime in the not too distant future I'll have to write a post on it for 812 - The Home!

A Small Screwdriver and Pick Rack
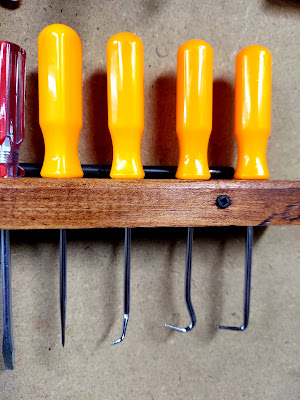
If you've followed 173 for any time at all, you may have noticed I like a lot of my tools to be in the open, mostly for ease of finding, but also because I have a history of forgetting what tools I already have! With that in mind, I recently got a set of small picks and screwdrivers. So, much like the small screwdriver holder on the tool board over the bench, I decided to make a customized little rack that could accommodate the different pick shapes.

Once again, scrap wood, drill press, stain, shellac and mount. If you look closely, you can see why I needed to customize this rack.
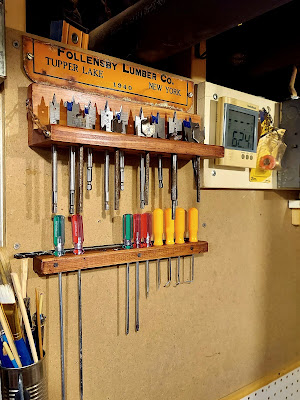
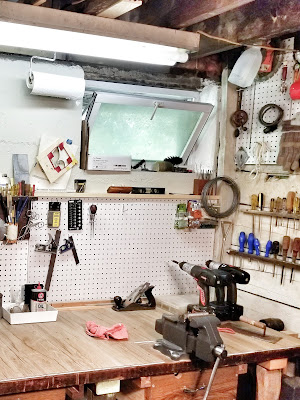
Their Natural Habitat
Just because it's become kind of a 'thing' for me, here's a picture of the paddle bit rack and the small screwdriver/pick rack in their natural habitat:
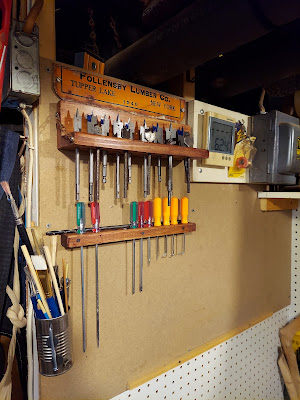
One day that picture will be a little more interesting. I'm (very slowly) working on a project that will change that picture profoundly. Of course, at the rate I'm working on it, you and I will have long since forgotten about it being mentioned here.
A man who works with his hands is a laborer; a man who works with his hands and his brain is a craftsman; but a man who works with his hands and his brain and his heart is an artist. - Louis Nizer
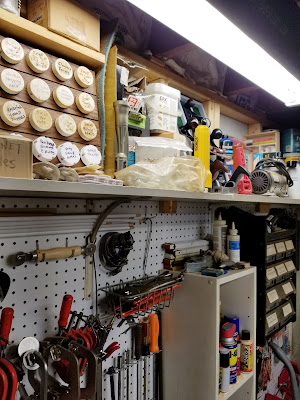
New Shop Lights
And now we come to the last part of the workshop update - new lighting! This one is incredibly exciting as the workshop has had less-than-optimal lighting since day one. Over the bench was a fluorescent light. I mean it worked, it was old but - it worked, except when it was humid, one of the tubes wouldn't light. When it was cold, the other tube wouldn't work. But all-in-all...it worked. Here's a shot of it from a couple years ago...
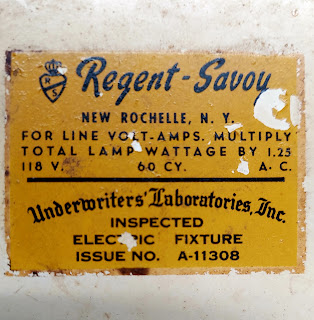
Here's an interesting little note, when taking the light down, I guessed it to be form the 1970s. Turns out it was a little older than that!
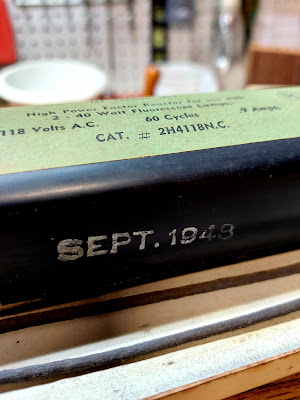
1948! That was a while ago, I had no idea fluorescent lights dated that far back, or that they could last this long. And just for posterity, I'm adding the label from the inside of the lamp. I couldn't find a trace of this company on the internet.
The other two lights in the workshop were bare-bulb lamps recycled from some other project, of which I have no recall. They sat around for a few years, and one day 10 or 15 years ago, I wired them up. But a few weeks ago I was driving back from work and stopped at a store. They had LED lights in the shape of fluorescents, so I picked one up. Then the other day, I decided to pick up a couple more so the workshop would have some real lighting, and about 2 hours later it was like walking into the sun!! I couldn't capture the brightness on my camera, but here are 2 of the lights...
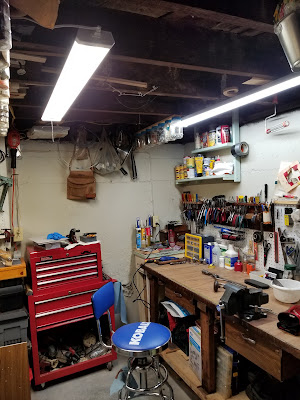
And the third one is on the south wall by the plane rack...
And there you have it. A little update on the workshop. They're not fancy, but but they're the kind of small projects that make the shop a little nicer!
Thanks for indulging me!
