

It Took a Couple Years But It Got Done
The full story of how the hallway at House 173 slowly transformed into a brighter, more functional part of our old home.
This is the megapost story comprised of about a dozen posts of the great wallpapering project that started in 2012 and finished in 2018. Looking back I have no idea what happened there, maybe just the dread of a difficult task in difficult positions? I dunno, that doesn't sound like me but I have no other explanation! Maybe I'll just chalk it up to spending all that time trying to pick just the perfect color! Whatever...
Estimating Time Requirements - Anyone's Guess (but mine) - 3/16/12
Notice to anyone out there who may, in some crazy, Twilight-Zone induced stupor, ask me to do a project for you: I cannot, with even a modicum of accuracy, estimate how long ANY project will take. You've been warned. Problem is - I know this about myself. I see a project, mull it over, think on it, dream of it, plan it all out. I get the steps in my head and can see every phase and every detail in my head and think - well, this won't take long at all. I should have this done in XX hours - no time at all. Oh yes, I will remember my sad and humbling time underestimations of the past, but OOOOHHHH not THIS time! This time'll be different! I'm older and wiser. I've honed my skills over projects past! This'll be done in a jiff! No problem. And guess what - I did it again! I've deluded myself, suppressed memories (or would they qualify as nightmares?).
Here's what happened. I decided to wallpaper the two hallways and the stairwell (before you judge - I'll explain that in another post). Well, as all who have ever hung wallpaper know - hanging wallpaper is not as simple as putting paste on the paper and hanging it. Not. At. All. All I wanted to do was paper this hallway:

As you can see, there's not a lot of "wall" in this hallway. It's mostly doors and trim. So I figured prepping, priming/sizing the walls, mmmm what? Maybe an hour? No. Nope. Uh uh. Two - with all those doors and trim there was a LOT of cutting-in. Then there was the upstairs hallway. Again - prepping, priming/sizing the walls, my guess? Another hour. Reality? Two hours. This is not encouraging.

And the stairwell...

It's hard to get this on camera, but the stairwell walls are huge! My pre-project guess - two hours for prepping, priming and sizing. Reality? I have no idea - haven't even gotten to it yet. So what I thought would be a weekend project, has stretched to a whole weekend and several after-work hours. I have about half of the downstairs hallway papered, the upstairs hallway prepped and primed and the stairwell, well...

Moral of the story...I cannot estimate, with any sense of near accuracy, the time needed for a project. That, or I grossly overestimate my abilities. Either way - projects take a loooong time! Happy weekend everyone!
A (Very) Little Wallpaper Progress - 3/23/12
Remember my last post wherein I was bemoaning my inability to estimate how long a project would take? Well here's exhibit A...
See that corner? Looks innocent enough right? See the two doors on adjacent walls? See the little bit of moulding on the door trim? Long story short: an hour-and-a-half for one piece of wallpaper! That's right kids, you read right. An hour-and-a-half. The upside is I've subsequently hit an area with straighter shots so I'm beginning to see progress!!
Product Review: EZ Twist Paint Stick - 3/25/12
NOTE: I have in no way been compensated for, or contacted by the manufacturer regarding, review of this product.
Significant progress is finally being made on the wallpapering of the two hallways and the stairwell. One significant thing that's changed is the priming/sizing is finally done. Yesterday, a neighbor came over to help me get the stairwell primed. This is significant because, somehow in my dotage, I have developed a bit of uneasiness with heights. This particular post is about a product that was used - the EZ Twist Paint Stick.

I hate painting. I hate painting nearly as much as I hate a root canal...nah, I think I might hate it as much as a root canal. I'm not a big one for taking shortcuts, but when it comes to painting, I'm always more than willing to find a way to get it over. Truth be told, if I could, I'd find someone else to get it over with! But the EZ Twist Paint Stick makes painting fun and easy! Okay, that may be a bit of hyperbole, but it really did make painting easy and a lot faster! I picked up the paint stick at Lowes for about $25. It took about two minutes to assemble, and the instructions were clearly written. The plastic lid goes on the paint can with the little spout. There's a port near the end of the roller-end of the handle, and that port goes on the spout. You pull back the end of the handle and the entire handle fills with paint.
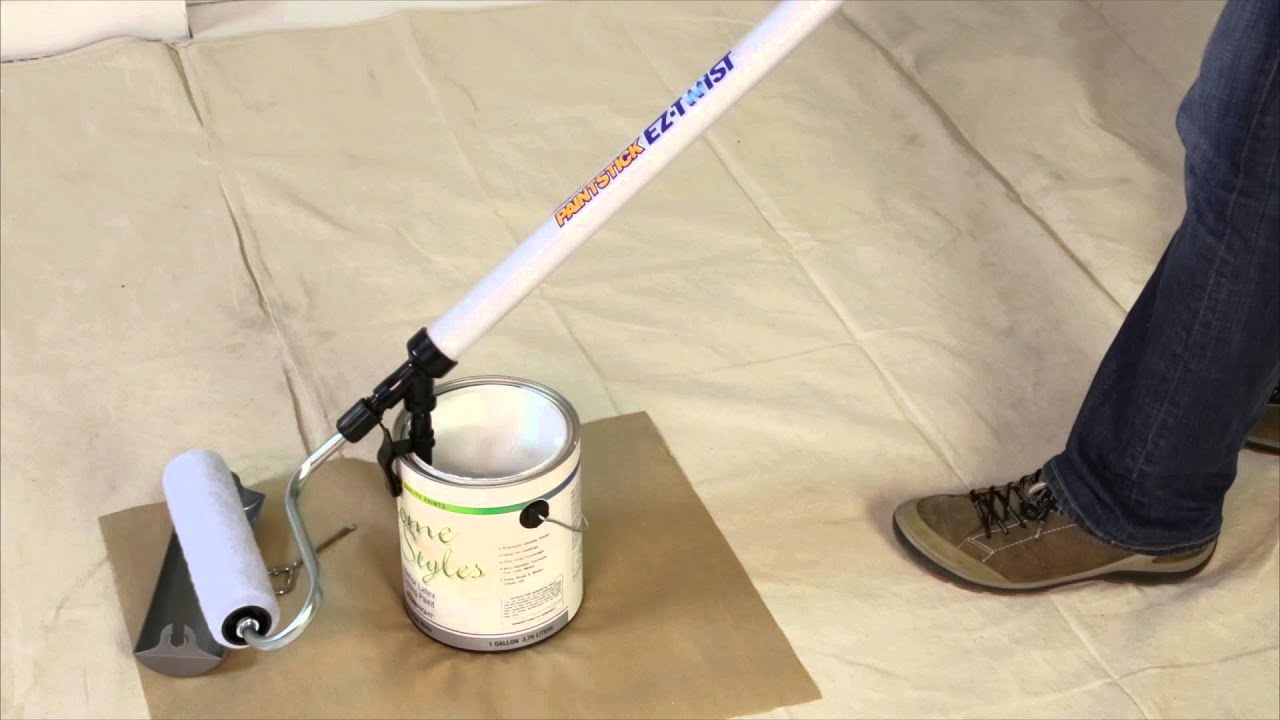
To get the paint into the roller, just twist the end of the handle and it feeds the roller. A little trick I figured out was, put the roller against the wall and push up and down in a rolling motion as you fill the roller. This will even out the paint on the roller from the inside, and will prevent you from over-filling the roller. That's about it! Roll the paint on and twist the handle a little when the paint starts to run out and it keeps feeding the roller!

My neighbor with no sense fear of heights.


PROs:
Inexpensive
REALLY easy to use
No need to keep going back to a roller pan.
No dripping
The long handle makes for great reach!
Easy cleanup
CONs:
I haven't come across this yet, but the only potential con I can think of is if replacement parts become obsolete or just hard to find. The roller is proprietary, and I would guess that the "O" rings might need replacing on occasion.
OVERALL IMPRESSION:
I flat out love the paintstick. Once all the cutting in was done, the priming of the entire stairwell was done in about 20 minutes (after taking down the homemade scaffolding). At this point, after using it for one job so far, I would HIGHLY recommend the EZ Twist Paint Stick!
PS: I still hate painting.
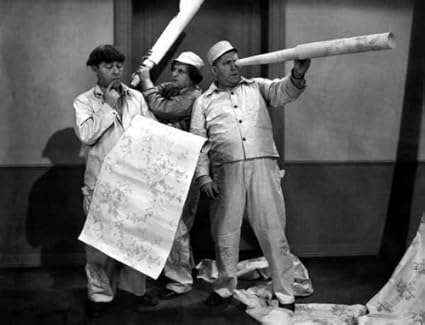
I know you must weary of me whining about the wallpapering taking so long, but I finally figured out why it's dragging on...and on...and on! See that picture? You probably think that's the Three Stooges huh? Well, that's what wallpapering at 173 looks like. Yes, it is the Three Stooges, but it's a striking resemblance!
Getting bogged down
4/21/12I know you must weary of me whining about the wallpapering taking so long, but I finally figured out why it's dragging on...and on...and on! See that picture? You probably think that's the Three Stooges huh? Well, that's what wallpapering at 173 looks like. Yes, it is the Three Stooges, but it's a striking resemblance!
In the first post of the year I made a brief list of projects I wanted to get done this year. Working on the hallways and stairs was on the list, but it's taking much, much longer to get done than I anticipated. Back in late January I got started on stripping paint on the front porch, but I put that on hold because I really, truly thought I could wallpaper the hallways and stairwell in a weekend or two. So about a month-and-a-half later, and after a few pieces went up today - we're still not done! AAAAAAAHHHHHH!!!! But it's coming. When the whole thing is done there's going to be a HUGE celebratory post! In the meantime, I'll continue to post about plants, and flowers, and maybe even the ice cream truck- who knows!
Hope everyone's having a great weekend!
UPDATE: The wallpapering finally does get done - in 2018!
Getting the Wallpaper Started - Again
4/22/18With the dining room 99.76% finished, it's time to get one last project completed - hopefully before it gets way too nice to be inside. The goal is to finish wallpapering the hallways and stairwell, get it all painted and new lights in. Let's see, April 22 - not sure how that's going to go!

Wallpapering has never been a strength of mine, so I've had to do some studying, lots of YouTube videos and peoples' blogs. But I also turned to (as I often do) an old DIY book that is old enough to address many of the peculiarities of old 173.

In particular, I found this page to be very useful:

The project is well under way at this point, the front porch is once again the staging area:

Ladders are set up...

The downstairs hallway in nearly complete...

The upstairs hallway is almost papered...

And now it's time to turn the corner into the stairwell.

One last thing for now. I want to go on record what I think will be the color of the hallways and stairwell...

Hallways: A Bit of Progress
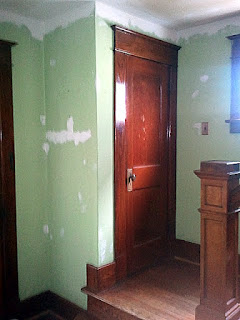
4/27/18I just got to thinking - I didn't include any "before" pictures in the initial post for this project. That's probably because - once again I don't have any! This is the closest I have.

Today I made a little more progress. It's a funny thing, in my middle-aged years (ok, who's kidding who? I'm 54 years old - can I really expect to live to 108?), anyway - I've found myself less than excited about standing on a plank mounted on a windowsill and a ladder at the top of the steps. Be that as it may, I'm doing it, and the stairwell is under way!

Here's another angle - really not that far above terra firma but geeze - less than thrilling!

And the view looking down:

Now time for two of the most boring pictures ever posted anywhere:

The plaster in the corner at the top-most part of the wall (of course) had cracked over time, so I took care of that today.

Ha! Told you they were boring! Well, I suppose this is as good a spot as any to register the wallpaper so I'll know later what brand, etc was used. Also boring, but not quite as bad as above!

Now, don't we feel better?

It's paintable wallpaper, I've never used it before, but thought it would be nice to change the color without having to re-paper! The one flaw I find with this kind of wallpaper is that it's very difficult to trim when it's wet, otherwise it's a very forgiving paper. Thank for bearing with me on this post - they can't all be exciting! LOL

Hallways Trouble Spot
5/7/18When I was a kid, baseball ruled! I mean - everything was baseball and baseball was everything. Baseball cards all year...
 |
| My very first ever baseball card - 1972. |

and Little League games at Center St. Park, the Washington Ave park and Arnot Park...

What does all this have to do with remodeling the hallways? Well, quite frankly - nothing at all! But when I thought of a title for this post it made me think of those halcyon days is all! But back to 40 years later...with the wallpapering in the hallways and staircase done, it's time to finish prepping. One of the problems I noticed was a little bubbling in the drywall tape at one joint in the ceiling. No matter what I did, I just couldn't get it to work. And of course I didn't get a before picture, but eventually I came to the conclusion that I just had to cut out that length of tape...

And instead of using paper tape again, I used vinyl mesh tape...

The Ceilings
5/11/18
Things are really moving along with the halls and the stairway now! The trouble spot is fixed, and all the sheet rock seams are sanded...

And really - is it just me or does sanding joint compound absolutely suck? Even with every inch of the floors and stairs covered...

I know, this was before I got all the drop cloths down. ...that dust gets everywhere! Just one of those necessary evils I guess. After some cleaning, the ceilings were primed and painted. Sherwin Williams had a 30% off sale, and they're practically around the corner from 173, not to mention that I really like their paint (and no, this is not a sponsored post), so I got ceiling paint in "pure white", which is 2 shades darker than ultimate white (or something like that).

The paint went on great, but a second coat is necessary. This is definitely not because of paint coverage, it's all about the painter's coverage! I missed a few spots. After that - it's just a matter (notice I didn't say a "small matter") of painting the walls!

Getting close!
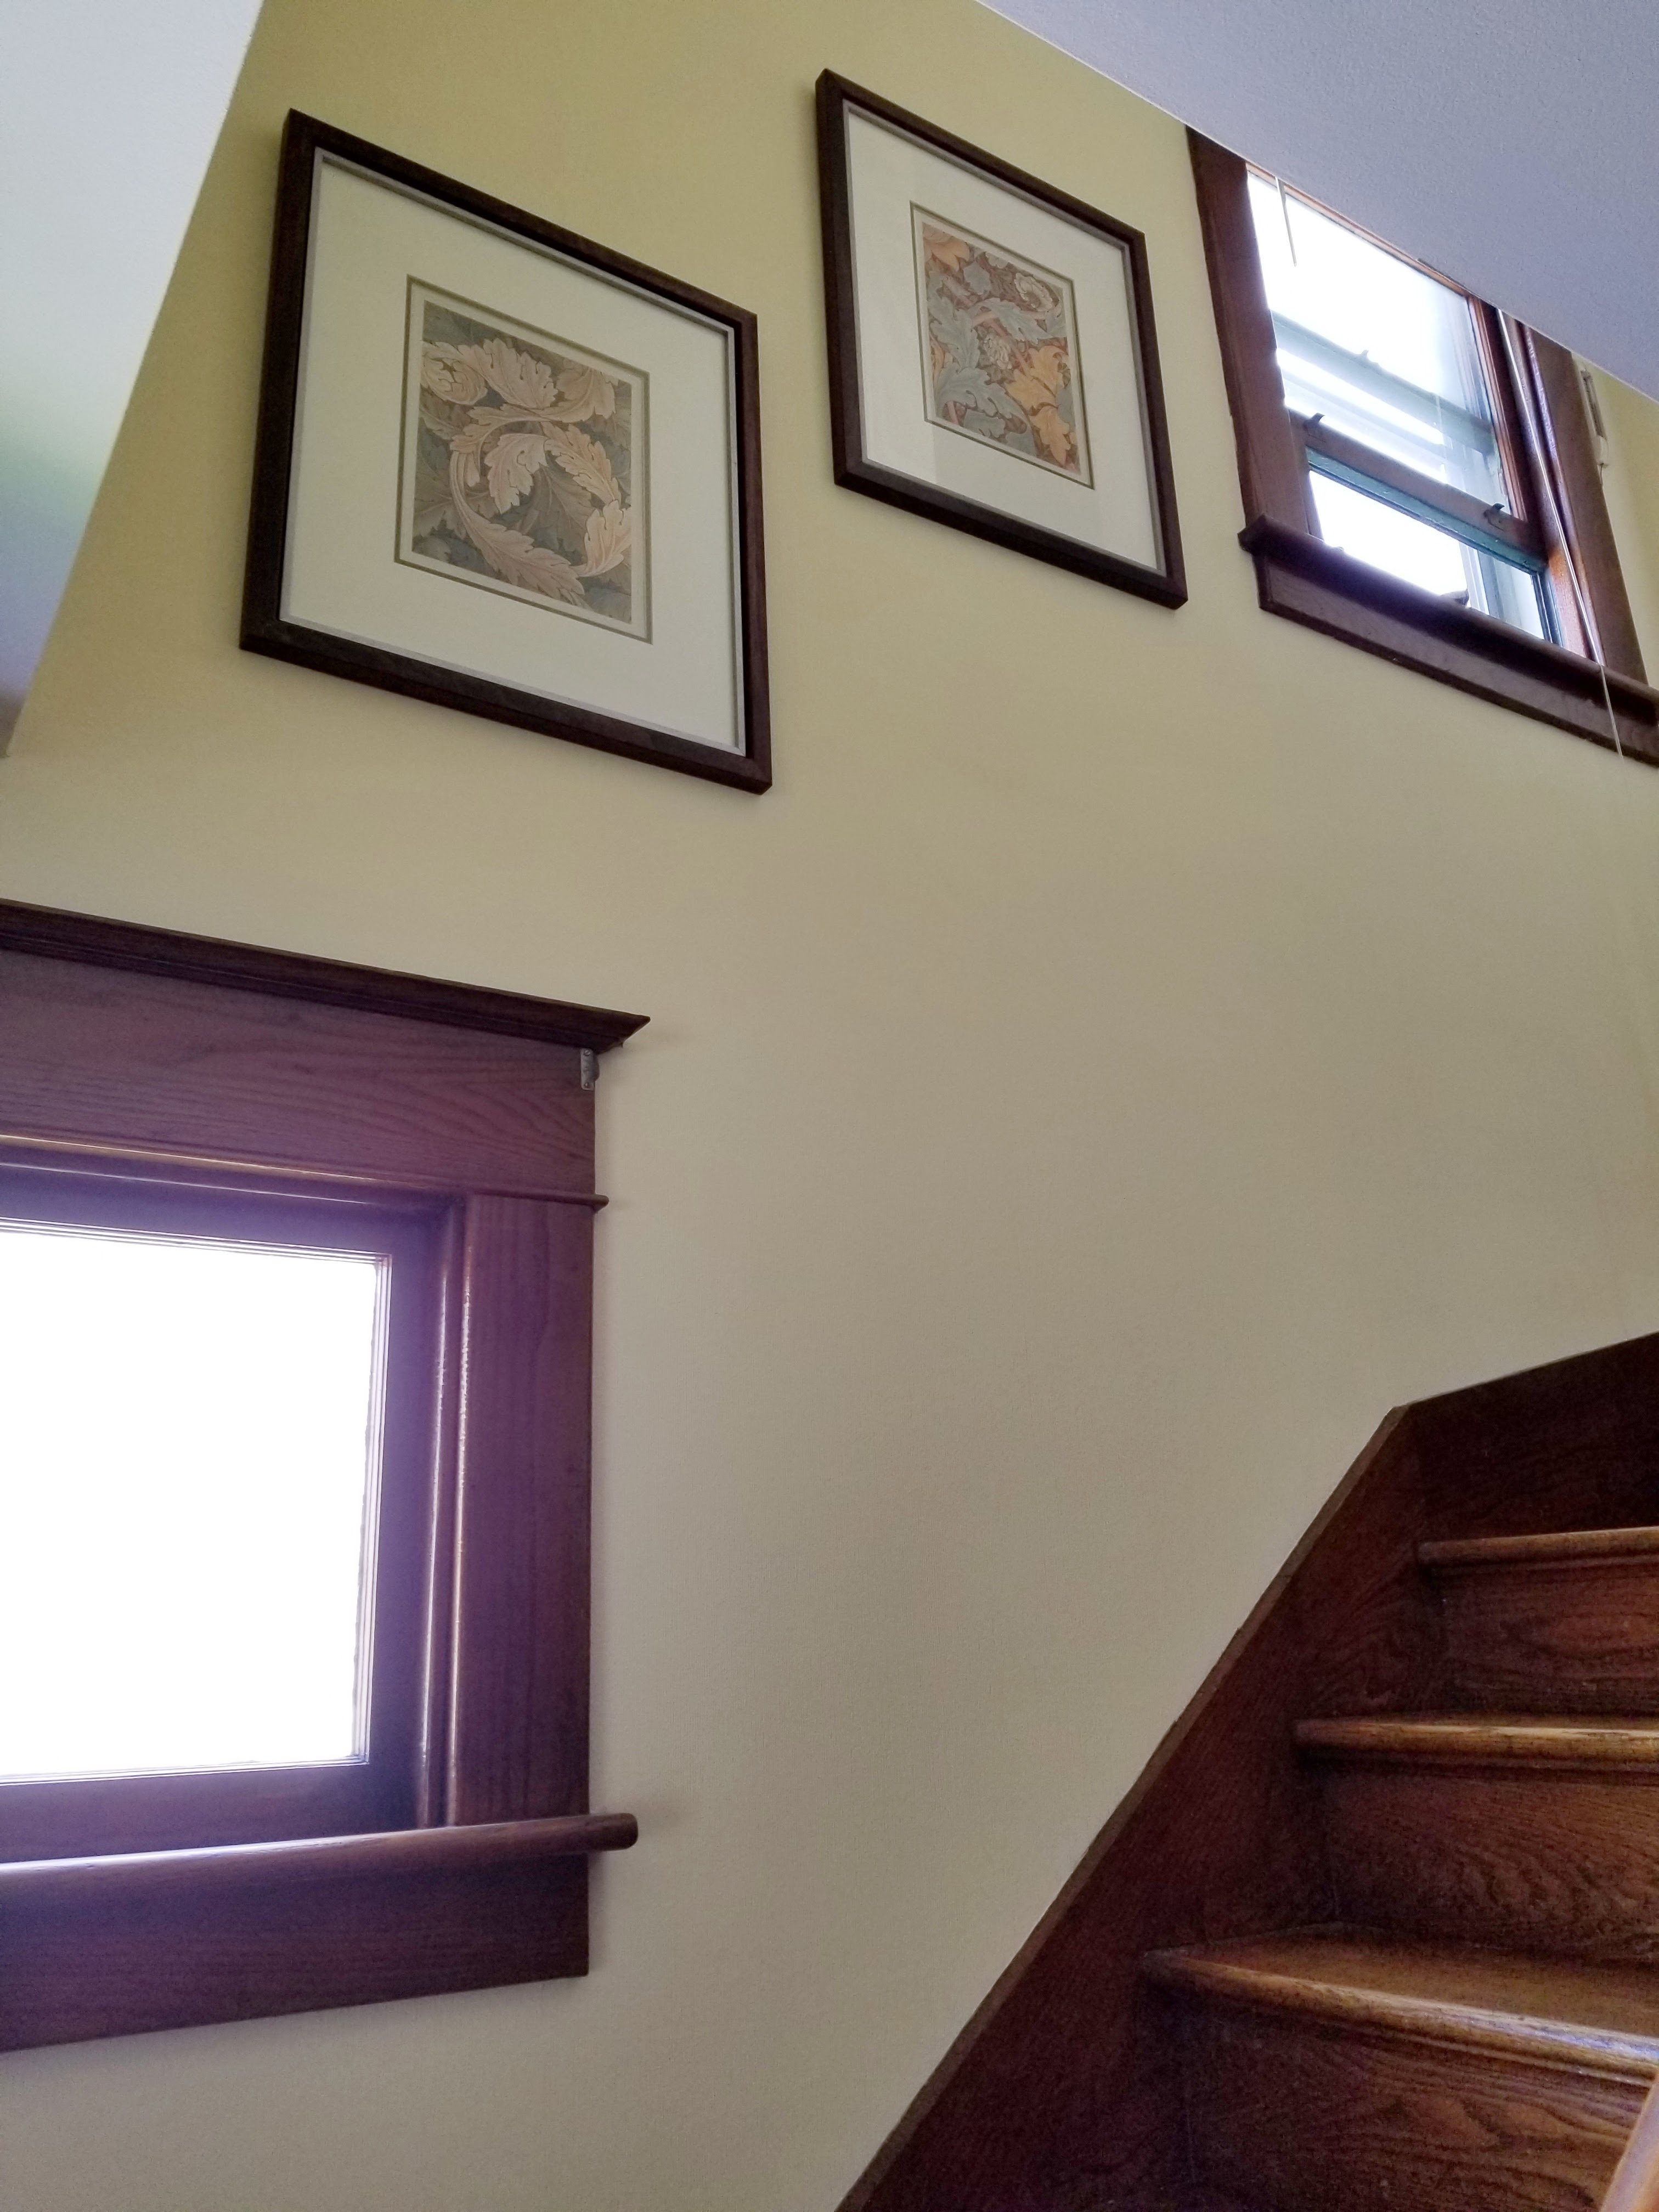
Ta-daaah! And at long last, the hallways and stairwell are painted! A few weeks ago (April 22nd to be precise) I mentioned that the plan was to paint the walls Sherwin Williams' "Lily". Usually, early-project color choices don't pan out, but this time it did! "Lilly" is a beautiful light yellow that, depending on the light, looks like butter, or lemons or a light green, or white...but for the most part it looks like a yellow lily! So this post will be mostly pics.

Looking down the stairs...interestingly, in this next picture you can see the edge of the corner. It looks white but it's actually painted - it's just a matter of how the light hits it!


So that's a few pictures...love the color! Now it's onto choosing window treatments, replacing light switches, outlets and installing lights. Of course, the lights haven't been selected yet, but I have a vision!
At long last 173 has new lighting in the hallways and stairwell! Not only that...all the outlets, phone jacks, switches and plate covers are changed out! Let's start with the switches and plates. These first couple pictures were taken right before painting, but they show the new plates really well:
Things are really moving along with the halls and the stairway now! The trouble spot is fixed, and all the sheet rock seams are sanded...
The paint went on great, but a second coat is necessary. This is definitely not because of paint coverage, it's all about the painter's coverage! I missed a few spots. After that - it's just a matter (notice I didn't say a "small matter") of painting the walls!
Getting close!
Meet Sherwin Williams' "Lily"
5/13/18Ta-daaah! And at long last, the hallways and stairwell are painted! A few weeks ago (April 22nd to be precise) I mentioned that the plan was to paint the walls Sherwin Williams' "Lily". Usually, early-project color choices don't pan out, but this time it did! "Lilly" is a beautiful light yellow that, depending on the light, looks like butter, or lemons or a light green, or white...but for the most part it looks like a yellow lily! So this post will be mostly pics.
Looking down the stairs...interestingly, in this next picture you can see the edge of the corner. It looks white but it's actually painted - it's just a matter of how the light hits it!
And...you guessed it - up the stairs!
And from a little farther out...
I was trying to get the view from the living room. You can see a bit above the window -
So that's a few pictures...love the color! Now it's onto choosing window treatments, replacing light switches, outlets and installing lights. Of course, the lights haven't been selected yet, but I have a vision!
New Lights, Outlets and Switches
5/2018At long last 173 has new lighting in the hallways and stairwell! Not only that...all the outlets, phone jacks, switches and plate covers are changed out! Let's start with the switches and plates. These first couple pictures were taken right before painting, but they show the new plates really well:

I went with brown switches and outlets...

We went with Imperial Bead Aged Bronze set from AmerTac. They didn't score great on Amazon (3.5 I think) but they're fantastic. A nice solid metal and the finish is gorgeous. Of course, they went on after the switches and outlets were replaced. I'm always nervous about messing with electricity, but I'm glad I did. Some of the outlets and switches had no ground, and now all of them do. Here's a shot that'll show you why working with electricity here made me nervous:

What a mess! I had to clean it all up, reorder the wires and, just for safety sake, wrapped them with electrical tape! And here's a sampling of some of the switches that were still here at 173!

That brings us to the lights. Check this out, less than a year after moving into 173, the first round of hallway and stairway remodel was done, and the most modern lights we could afford went in...

Those notes are from my pre-blog house journal. $80 for all three lights! Certainly there were better quality lights back in '98, but like I said - the best we could afford! The downstairs hallway light was one of these:

Remember those? Hey, back then they were in style! And by-the-way, according to the Huffington Post, some of the fashion styles of the 90's are back in style - including brass fixtures. Anyway, the new light is in and here it is!

I've mentioned before that the woodwork here at 173 is kinda Mission style, so we decided to go with mission lighting. This light was gorgeous, but it came with a single post from the base, so requisitioned the base from one of the bedrooms because it was a much more substantial-looking base:


The Tiffany-style lighting is very representative of the Mission style and just looks fantastic at 173! But there's another lighting look for the Mission style that tends toward Prairie style and is a beautiful compliment to the Tiffany style. To keep from making 173 too cutesy-matched, the chandelier would be Mission style, but lean toward Prairie! But, before we get there, here's the '98 chandelier:

Yep! She was a beaut! But alas, times change, styles change and the chandelier changed!

I love the lines!! And now, I have to tell you, not a single one of these lights was simple to install, not even the sconce! Just how it is with old houses, but it was well worth the effort! Finally, the bonus light. You see, I originally found the chandelier after days of searching. I just couldn't find the right one on Amazon, so I started looking on lighting websites...also no luck. Then I searched local lighting stores and finally found the chandelier that seemed like it would work. At the local place, the chandelier was about $140. Not bad, and less than what was budgeted so - yay! I was going to pick it up the next day. But the night I found the light, I was laying in bed and thought - I wonder if this can be found for even less, so I googled the company, style name and product number. Prices came up at different sites from $125 to some $400. Then I put the info into Amazon and wha-la! There it was...exact same company, product number and everything, but the price was different. $45! Yes, that's right - $45! So of course I had to buy it then and there. But when I clicked to pay, there was some other kind of Amazon discount automatically applied and the chandelier ended up costing....wait for it....$38!! Can you believe it? That's even less than the chandelier from 1998!
I mentioned the bonus light. Because of the incredible savings, I picked up a light for the phone stand in the front hallway!

See the little squirrel? Iconic of the little boogers that tease the pooch! So, there's the new lighting for the hallways! Now it's time for wrapping up little details for this project, so there should be just one more post on the hallways!
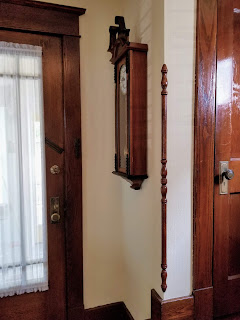
So I was wrong. In the last post I said there'd be one final post about the halls and stairway, and yet - here we are! Instead of one epic post, I thought I'd show some of the details I've been working on. For instance, both window sills in the stairwell were getting dull and faded:


Next was the corner protector. I bought this thing several years ago, just waiting for the day I' be able to put in in the hallway. It was bare oak, so I stained it with the stain formula I worked out for the baseboards on the dining room built-in which turned out to be a pretty close match to the wood here at 173.

After three coats of amber shellac (three seems to be the magic number), it was time to install it. Everything I read said to pre-drill holes and attach with finish nails. Why don't I ever listen the first time? I thought if I used my nail gun, there'd be no need for pre-drilling. Well, with the very first squeeze of the trigger, I blew out a little chunk of wood. Back to the workshop, repair, restain, reshellac, predrill holes and ta daa!...

And finally, I got the curtains hung. The neat thing is the finials on the curtain rods are birds! Just felt a little whimsical!

Back in May I posted about some of the stairway and hall details I was working on, one of which was the corner protector at the foot of the stairs...

There's another outside corner at the top of the stairs that I wanted a protector on also. The problem was...well, quite frankly - I don't know what the problem was! Three months later the new protector still hadn't been purchased! I had four different versions in my Amazon cart...

The one in the lower right corner is the match to the downstairs, and that symmetrical-leaning side of me thought that was the obvious choice. But then I thought - who says they have to match? I mean, 173 is a house full of asymmetrics (yeah - sometimes I make up my own adjectives)! The thought of the two corners not matching appealed to me because there was one in my cart that was different than the others, and I really liked it so...I figured why not?! The winner was...

The alluring part was that it wasn't round, the two sides were flat, making this one completely different than the protector at the bottom of the stairs! That's my revisionist story. The fact is, I did like the end of one pictured above, and I did want it to be different than the one at the bottom of the stairs, but in truth - I had no idea it wasn't round until the protector arrived at 173! What a happy accident, to quote Bob Ross!

Using the stain formula mix of two stains... 2 parts General Finishes Antique Walnut to 1 part Georgian Cherry that I finally figured out when I stained the dining room built-in baseboards...


Believe it or not, there's still one more decorating piece to do in the upstairs hallway, just haven't figured it out yet!
This past spring the hallways and stairwell were redone - finally. But, like most projects, there was still a matter of some details that needed to be completed, and in the case of the hallways it's just a matter of decor. The end of the upstairs hallway has always been a bit of a decorating challenge, at least for me!

(And no - the cordless drill was not a design element!) When we first bought 173, there was a full length mirror on that wall with a small fluorescent light above it. I took both down when we painted it the first time back in about 1999, and when I was re-installing the mirror I tightened one of the wall clips juuust a little too much and - CRACK! - there she went. It was too bad too, the mirror was an old, heavy model with a nice beveled edge - leave it to me. Since then, that end of the hallway has essentially been blank. When the hallway was finished earlier this year, I installed a new sconce...


I prattle on because I want to point out the primary cause for that wall of the hallway being such a decoration challenge. You see, when I took out the old mirror and light, I wanted a switch to work the light box. I was still pretty new to remodeling, so I put in a switch at the nearest possible point:

Putting both the sconce and the switch at just the proper height and placement for hanging pictures. I thought about changing it all, but then thought that 173 is full of oddities, and this is just another harmless one! But then there was the challenge of how to make that wall less empty. Then one even I was watching an episode of Frasier, and noticed this in Niles' office:

A sconce similar to the one here at 173, right about the spot you'd hang a picture, but oho!! I never thought of hanging one below the sconce! Brilliant! And I knew just the picture I wanted, a longtime George Inness work called Medfield Massachusetts:

It's always been one of my favorite paintings, and the colors fir perfectly with the hallway, so up it went! Here's a shot in daylight:

It gets a little washed out, but it still looks awesome, but it really pops in the evening with the sconce turned on!

There - that end of the hallway finally looks better!
Then there was the upstairs wall sconce. Again, back in '98 the style was...
Now...and I love this...
The Tiffany-style lighting is very representative of the Mission style and just looks fantastic at 173! But there's another lighting look for the Mission style that tends toward Prairie style and is a beautiful compliment to the Tiffany style. To keep from making 173 too cutesy-matched, the chandelier would be Mission style, but lean toward Prairie! But, before we get there, here's the '98 chandelier:
Yep! She was a beaut! But alas, times change, styles change and the chandelier changed!
I love the lines!! And now, I have to tell you, not a single one of these lights was simple to install, not even the sconce! Just how it is with old houses, but it was well worth the effort! Finally, the bonus light. You see, I originally found the chandelier after days of searching. I just couldn't find the right one on Amazon, so I started looking on lighting websites...also no luck. Then I searched local lighting stores and finally found the chandelier that seemed like it would work. At the local place, the chandelier was about $140. Not bad, and less than what was budgeted so - yay! I was going to pick it up the next day. But the night I found the light, I was laying in bed and thought - I wonder if this can be found for even less, so I googled the company, style name and product number. Prices came up at different sites from $125 to some $400. Then I put the info into Amazon and wha-la! There it was...exact same company, product number and everything, but the price was different. $45! Yes, that's right - $45! So of course I had to buy it then and there. But when I clicked to pay, there was some other kind of Amazon discount automatically applied and the chandelier ended up costing....wait for it....$38!! Can you believe it? That's even less than the chandelier from 1998!
I mentioned the bonus light. Because of the incredible savings, I picked up a light for the phone stand in the front hallway!
See the little squirrel? Iconic of the little boogers that tease the pooch! So, there's the new lighting for the hallways! Now it's time for wrapping up little details for this project, so there should be just one more post on the hallways!
Working on the Details
5/25/18So I was wrong. In the last post I said there'd be one final post about the halls and stairway, and yet - here we are! Instead of one epic post, I thought I'd show some of the details I've been working on. For instance, both window sills in the stairwell were getting dull and faded:
A little cleaning and three coats of amber shellac later, much better!
After three coats of amber shellac (three seems to be the magic number), it was time to install it. Everything I read said to pre-drill holes and attach with finish nails. Why don't I ever listen the first time? I thought if I used my nail gun, there'd be no need for pre-drilling. Well, with the very first squeeze of the trigger, I blew out a little chunk of wood. Back to the workshop, repair, restain, reshellac, predrill holes and ta daa!...
And for good measure...closer view...
And finally, I got the curtains hung. The neat thing is the finials on the curtain rods are birds! Just felt a little whimsical!
So, with any luck, the next post really will be the final in this series!
One Final Detail
9/2/18Back in May I posted about some of the stairway and hall details I was working on, one of which was the corner protector at the foot of the stairs...
There's another outside corner at the top of the stairs that I wanted a protector on also. The problem was...well, quite frankly - I don't know what the problem was! Three months later the new protector still hadn't been purchased! I had four different versions in my Amazon cart...
The one in the lower right corner is the match to the downstairs, and that symmetrical-leaning side of me thought that was the obvious choice. But then I thought - who says they have to match? I mean, 173 is a house full of asymmetrics (yeah - sometimes I make up my own adjectives)! The thought of the two corners not matching appealed to me because there was one in my cart that was different than the others, and I really liked it so...I figured why not?! The winner was...
The alluring part was that it wasn't round, the two sides were flat, making this one completely different than the protector at the bottom of the stairs! That's my revisionist story. The fact is, I did like the end of one pictured above, and I did want it to be different than the one at the bottom of the stairs, but in truth - I had no idea it wasn't round until the protector arrived at 173! What a happy accident, to quote Bob Ross!
And three coats of amber shellac...
The color-match was uncanny!
Sorry, it's hard to get a good closeup in the space of the stairwell!
But you get the idea! And here's a distant shot...
Believe it or not, there's still one more decorating piece to do in the upstairs hallway, just haven't figured it out yet!
Yet Another Detail
10/14/18This past spring the hallways and stairwell were redone - finally. But, like most projects, there was still a matter of some details that needed to be completed, and in the case of the hallways it's just a matter of decor. The end of the upstairs hallway has always been a bit of a decorating challenge, at least for me!
(And no - the cordless drill was not a design element!) When we first bought 173, there was a full length mirror on that wall with a small fluorescent light above it. I took both down when we painted it the first time back in about 1999, and when I was re-installing the mirror I tightened one of the wall clips juuust a little too much and - CRACK! - there she went. It was too bad too, the mirror was an old, heavy model with a nice beveled edge - leave it to me. Since then, that end of the hallway has essentially been blank. When the hallway was finished earlier this year, I installed a new sconce...
...which matched the downstairs hall light...
I prattle on because I want to point out the primary cause for that wall of the hallway being such a decoration challenge. You see, when I took out the old mirror and light, I wanted a switch to work the light box. I was still pretty new to remodeling, so I put in a switch at the nearest possible point:
Putting both the sconce and the switch at just the proper height and placement for hanging pictures. I thought about changing it all, but then thought that 173 is full of oddities, and this is just another harmless one! But then there was the challenge of how to make that wall less empty. Then one even I was watching an episode of Frasier, and noticed this in Niles' office:
A sconce similar to the one here at 173, right about the spot you'd hang a picture, but oho!! I never thought of hanging one below the sconce! Brilliant! And I knew just the picture I wanted, a longtime George Inness work called Medfield Massachusetts:
It's always been one of my favorite paintings, and the colors fir perfectly with the hallway, so up it went! Here's a shot in daylight:
It gets a little washed out, but it still looks awesome, but it really pops in the evening with the sconce turned on!
There - that end of the hallway finally looks better!
And that's the story of the hallway wallpapering project that embarrassingly spanned almost 6 years!
Thanks for stopping by and be safe out there!

Frequently Asked Questions
What is the best color for a small hallway?
Light neutral colors such as soft white, warm gray, beige, or muted sage can help small hallways feel brighter and more open.
How do you brighten a dark hallway?
Improved lighting, lighter wall colors, mirrors, reflective surfaces, and minimal clutter can help brighten dark hallways.
Are hallway makeovers worth it?
Yes. Hallways are high-traffic areas that connect the home, and updating them can improve flow, appearance, and overall comfort.
What flooring works best in hallways?
Durable flooring such as hardwood, laminate, vinyl plank, or painted wood floors are popular choices because hallways receive heavy foot traffic.
How can I decorate a narrow hallway?
Wall art, mirrors, vintage lighting, runners, and carefully chosen paint colors can add personality without making narrow hallways feel crowded.
Should old hallway trim be restored?
Whenever possible, restoring original trim helps preserve the architectural character and craftsmanship of older homes.
What lighting works best in hallways?
Flush mounts, sconces, pendant lights, and warm LED fixtures are commonly used to improve hallway lighting while maintaining style.
How long does a hallway makeover take?
Hallway makeovers can range from a weekend refresh to long-term renovations depending on repairs, painting, flooring, and restoration work involved.
Keywords
hallway makeover, hallway remodel, old house hallway
DIY hallway makeover, hallway before and after, hallway renovation, old house interior, hallway decorating ideas, hallway lighting ideas, hallway transformation