

━━━━━━━━━━━━━━━━━━━━
JP FLEMING CO. WORCESTER, MA
EGGBEATER STYLE BREAST DRILL
INHERITED FROM THE MOSHERS
━━━━━━━━━━━━━━━━━━━━
A forgotten JP Fleming breast drill proves that even neglected tools still have another chapter to write.
Twenty-Five Years Waiting
This drill has literally been hanging around the work shop for at least 25 years, that's every day since purchasing 173 from the Moshers - no telling how long they had it down there. There was a small, may 1/8" bit in the chuck, but the chuck was rusted closed, and I never took the time to fix that, so there it hung all these years. I actually started on this restoration back on August 23, but I had to put it on hold for something much more important - we'll talk about that another time, and I finished it with about an hour's work today.

Anatomy of a Breast Drill
Because breast drills aren't all too common these days, I thought it might help to include a diagram of the parts of a breast drill. This will help to make this post a little more understandable.

The breast drill is made up of the following parts:
- breastplate
- drive handle
- speed shifter
- side handle
- speed gears
- pinion gears
- chuck

Dismantling
The drill itself was in decent shape except the rusted chuck, chipping paint and some surface rust. Because as in so many instances, I didn't take a before picture, I had to pull this one down from the internet. While it's not mine, this is almost an exact duplicate of the condition my drill was in...
.jpg)
The first thing I did was dismantle the drill, a rather simple task in this case.

To remove the turning handle, I ground off the backside peen and punched it out of the gear assembly...

Breast drills typically exceed fifteen inches and are topped by a concave plate that provides a surface which the user can lean against when boring a hole. Sometimes referred to as "chest drills," "belly drills" or "knee drills," these tools were indispensable in the construction industry, in blacksmith shops, in factories and in shops where rail cars were fabricated. Ruggedly built, the drills are useful for boring holes in iron, steel and extremely tough wood. Designed with the expectation that a worker would be putting a fair amount of body weight into a task, the breast drills are especially effective when used in a standing position, alongside the work piece. - Kris De Decker in Low-Tech Magazine 12 Dec 2010
A Closer Look
In this shot, you can see the condition of the paint on the gear:

And here's the breast plate in similar condition...

Some RED projects you might enjoy!
∙ Red Devil No. 271 Tin Snips Resto 4/22/21
∙ Inherited Old Oil Can Restoration 7/2/21
∙ Powr-Kraft Ball Peen Hammer Resto 10/10/21
∙ Hand-Cranked Bench Grinder Resto 1/13/22
⎯⎯⎯⎯⎯⎯⎯⎯⎯⎯⎯⎯⎯⎯⎯⎯⎯⎯⎯⎯⎯⎯⎯⎯⎯⎯⎯⎯⎯⎯⎯⎯⎯⎯⎯⎯⎯⎯
Here's some more tool restorations!
Preparing for Paint
Before getting to the paint, I took the drill post to the wire wheel on my bench grinder, one of my favorite tools because of how quickly I can remove rust from tools.

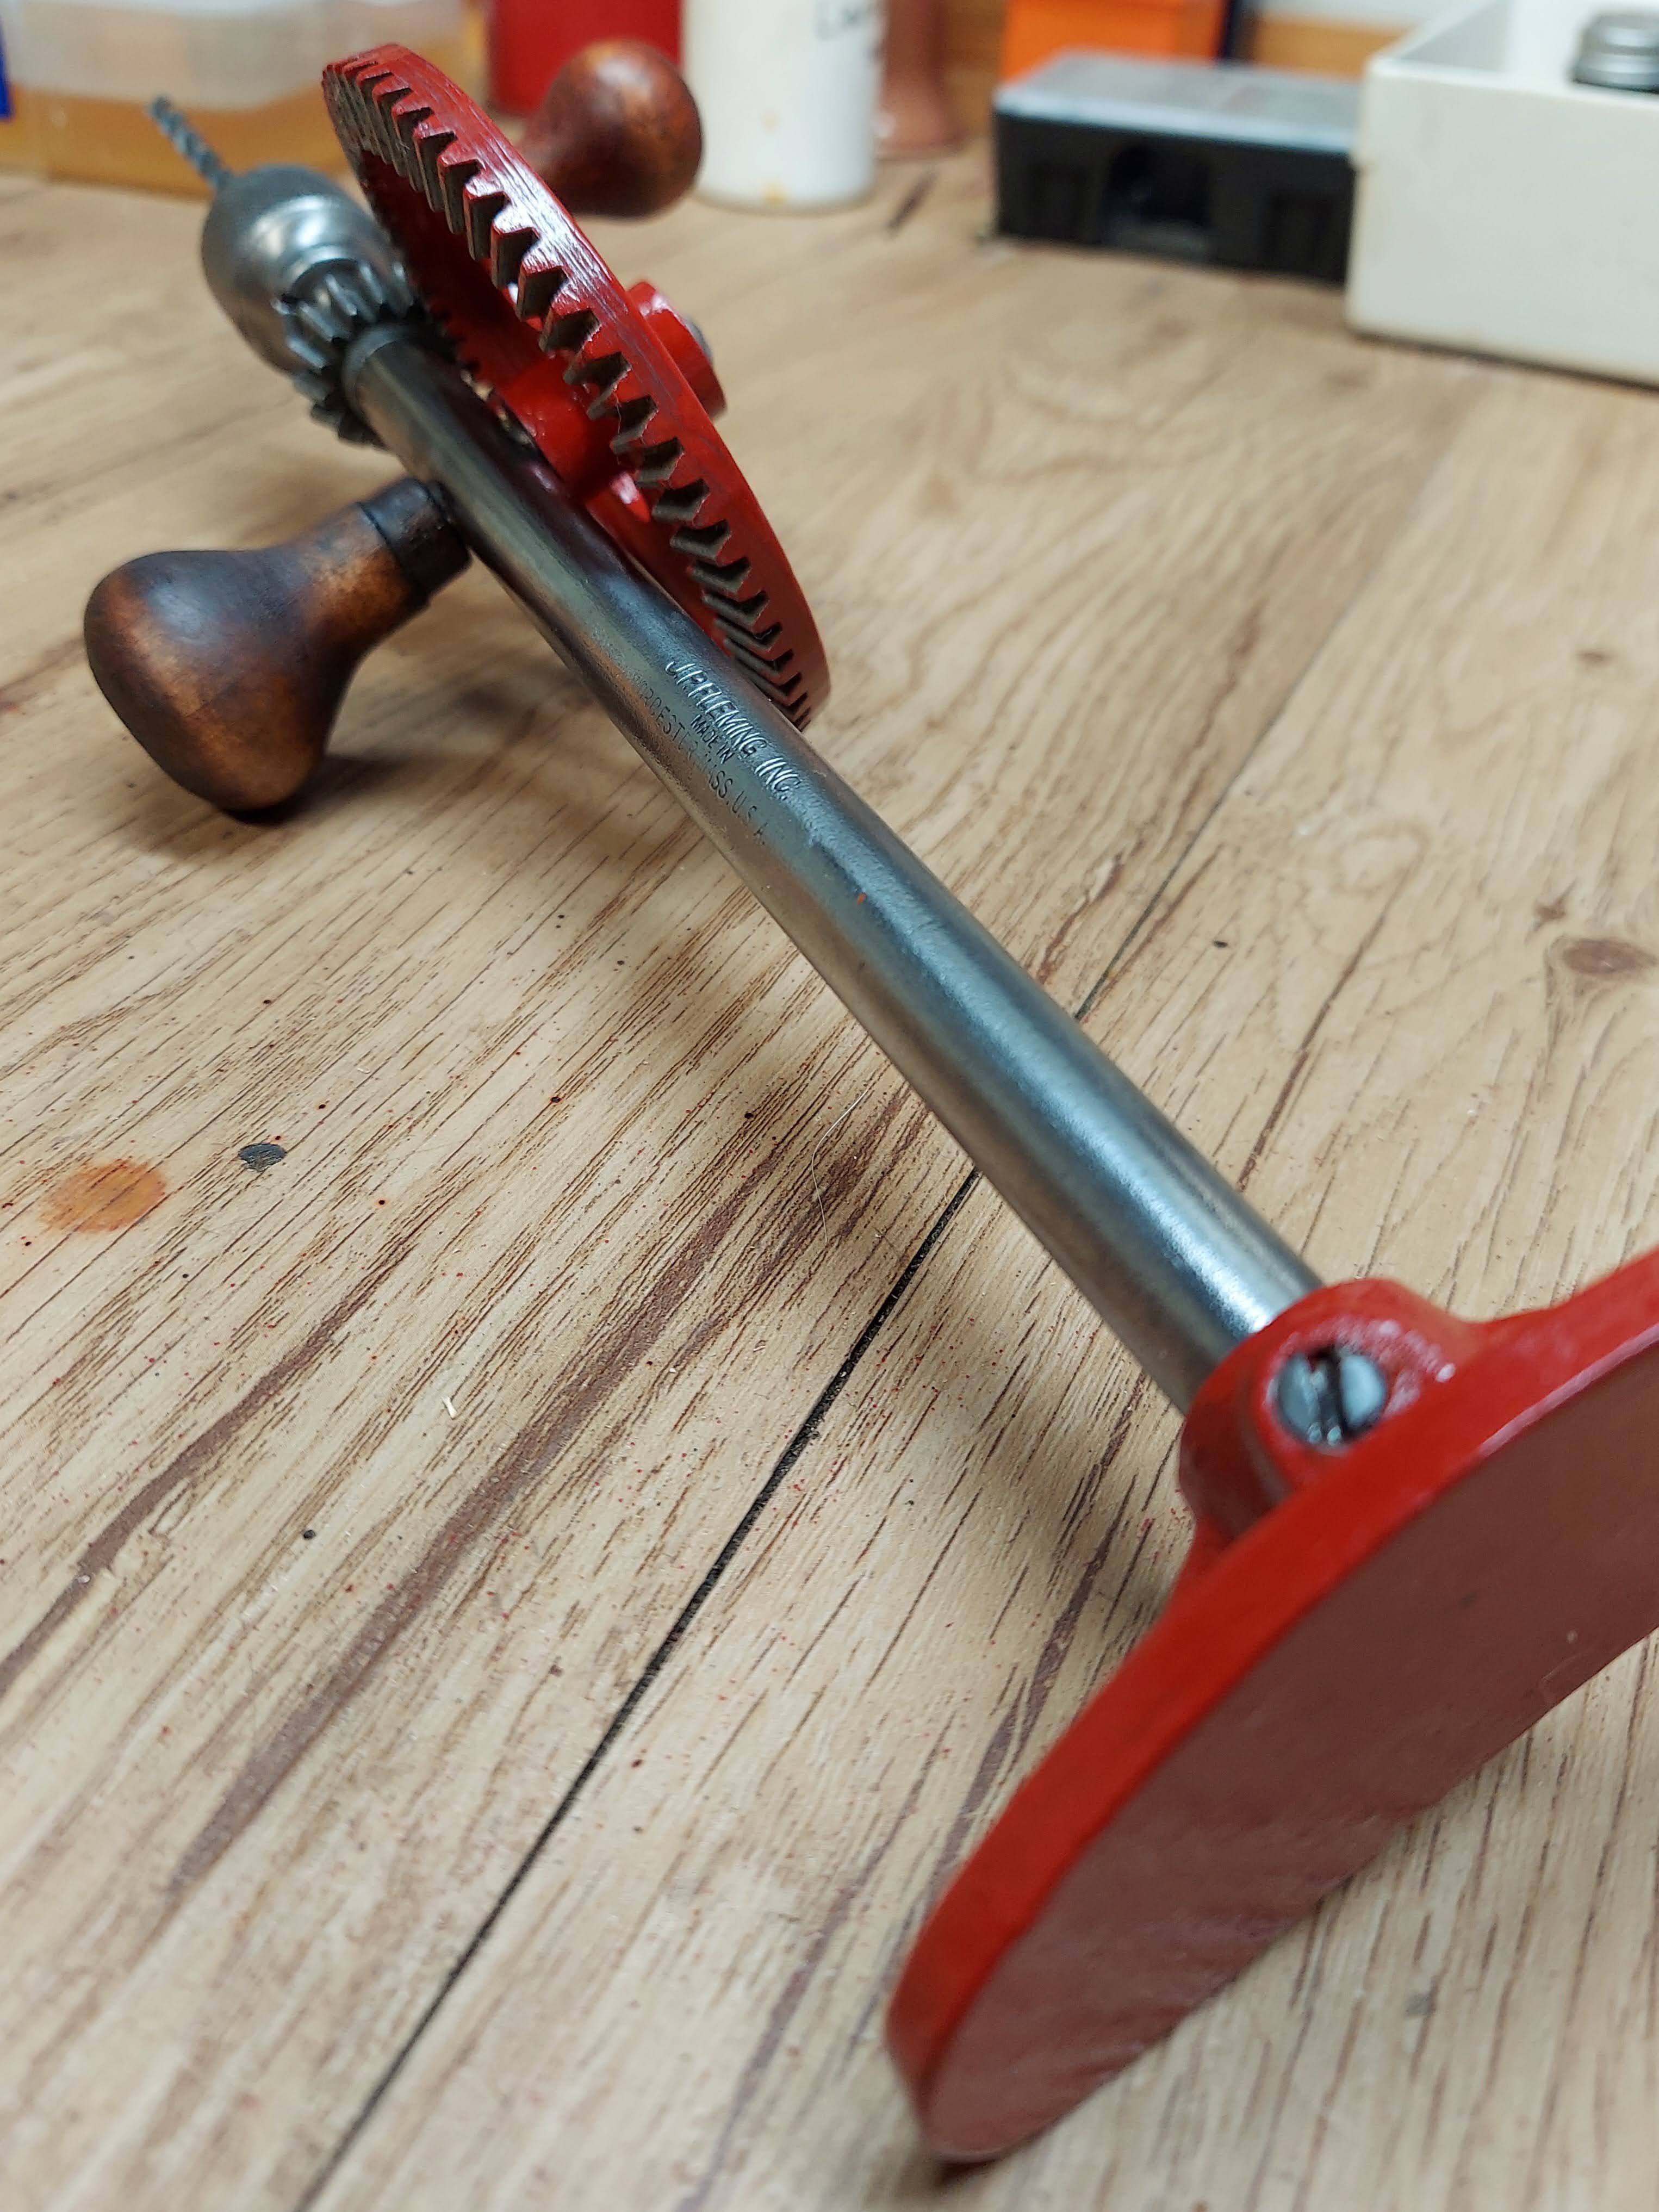
Identifying the Maker
In removing the rust though, I found the maker's mark. It's difficult to read so I made a little callout here:

Interestingly, the only things I could learn about the JP Fleming company is that, like so many other tool makers at the time, they were located in Worcester Massachusetts, and were bought out by Black and Decker around 1926. And that's pretty much it. From there, I put the gear and breast plate in a baggie with some CitriStrip gel for about 24 hours.

After cleaning the gel off the metal parts, the tool was pretty much ready for painting!

173's Signature Red
It's funny - 173's signature color is red, but I never said what particular shade it had to be. Oftentimes, it's Banner Red, but this time it's Regal Red. I suppose at some point I should do a side-by-side to see the difference.

It took a couple coats, and in between each coat I baked the paint on using my shop oven overnight...

Restoring the Handles
The handles were quite dirty and worn, so I scrubbed them with acetone and was able to remove most of the grime and patina. I didn't sand them because I wanted them to still show the years of use.

After the cleanup, I just re-stained them with some Minwax Red Mahogany:

The Reveal!
And in an instant, this project was done! While it was a quick and pretty simple project, I love the way it turned out!

Looking from the breastplate:
And a closeup of the gear and handle...

Yet another angle:

Its New Purpose
And I decided to chuck a countersink into the drill. This will make for ease of access and more control in countersinking screw holes in wood projects!

Thanks for stopping by!

Frequently Asked Questions
What is a breast drill?
A breast drill is a large, hand-powered drilling tool designed to bore holes in wood, metal, and other materials before portable electric drills existed. Unlike a brace, which is turned with both hands, a breast drill uses a geared mechanism and a broad breastplate that allows the user to apply body weight while turning a side handle. The design produces more power and control than smaller hand drills, making it especially useful for larger bits and tougher materials.
Why is it called a breast drill?
The name comes from the broad plate at the back of the tool. As the operator turns the handle, they press the plate against their chest, or more accurately, the upper torso, to apply steady forward pressure. This lets the user generate far more drilling force than with arm strength alone while keeping both hands free to operate the drill.
What were breast drills commonly used for?
Breast drills were indispensable in woodworking shops, blacksmith shops, carriage works, railroad maintenance, and general construction throughout the late nineteenth and early twentieth centuries. They excelled at boring larger holes, driving countersinks, and drilling metal long before electric drills became commonplace.
Who made JP Fleming breast drills?
JP Fleming & Company was a tool manufacturer based in Worcester, Massachusetts, during the early twentieth century. Although relatively little documentation survives, the company produced quality hand drills and related tools before eventually becoming part of Black & Decker during the industry's wave of mergers in the 1920s. Today, surviving JP Fleming tools are appreciated by collectors because they're encountered less frequently than brands like Stanley or Millers Falls.
How old are most breast drills?
Most surviving breast drills were manufactured between the late 1800s and the 1940s. Many remained in regular use well into the post-war years, particularly on farms and in small workshops where dependable hand tools often outlasted changing technology.
Are breast drills still useful today?
Absolutely. While electric drills are faster, a breast drill offers excellent control, especially for delicate work like countersinking, drilling pilot holes, or working where electricity isn't available. Many woodworkers also enjoy using them simply because they're quiet, reliable, and satisfying to operate.
Can an old breast drill usually be restored?
In many cases, yes. Most vintage breast drills were built with heavy cast iron, steel gears, and hardwood handles, making them remarkably durable. Surface rust, worn finishes, and stiff mechanisms are common and usually respond well to careful cleaning, lubrication, and refinishing. Unless major castings are broken or gears are missing, many can be returned to full working order.
Should vintage tools be restored or left original?
That depends on the tool and its historical significance. Rare or museum-quality examples may be best preserved in their original condition, while common working tools often benefit from thoughtful restoration. The goal should be to preserve the tool's character while making it functional for another generation of use.
Why were wooden handles used instead of metal or plastic?
Hardwood handles provided durability, comfort, and warmth in the hand while also reducing vibration. Species such as maple, beech, and ash were commonly used because they could withstand decades of use and were easily repaired or refinished when worn.
What finish works best for restoring old wooden tool handles?
Many restorers prefer traditional finishes such as boiled linseed oil, shellac, or light stain followed by shellac or wax. These finishes protect the wood while maintaining the warm appearance and feel that vintage hand tools are known for, without creating the thick plastic coating associated with modern polyurethane.
Why restore old hand tools instead of buying new ones?
Many vintage hand tools were built to exceptionally high standards using quality materials and straightforward engineering. Restoring them is often less expensive than buying comparable new tools, and it preserves a small piece of craftsmanship and history that might otherwise be lost. For many woodworkers, using a restored tool also creates a tangible connection to the generations who relied on it before us.
Why do tool restorations matter?
Every old tool has a story. Some belonged to family members, some spent decades in workshops, and others simply survived because someone chose not to throw them away. Restoring them isn't just about removing rust or applying fresh paint, it's about honoring the work they once performed and ensuring they're ready for whatever comes next.
Keywords
inherited breast drill refurbishment, breast drill restoration, antique breast drill, vintage breast drill, JP Fleming breast drill, JP Fleming tools, hand-powered drill, antique hand drill, vintage hand tools, restoring old tools, woodworking hand tools, antique tool restoration, breast drill anatomy, workshop tool restoration, tool restoration, House 173