

An Early Stanley DIY'er Tool
Built for farmers and do-it-yourselfers during hard times, this old Defiance still had plenty of life left in it.
I don't know where it ends. At what point does one say - I have enough tools, I'm not getting any more? Maybe, just maybe, that point doesn't exist. If it does, well, I haven't come to it!! You see, once again I made a trip the The Tool Box, my local used tool store, and picked up a couple pieces, I'll save the other one for a future project, but this post is about the restoration of the plane I picked up for $7 - a Stanley Defiance.
The Find
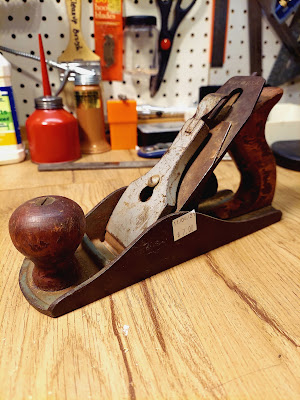
I found this plane along with another item, both on the same shelf and totaling a whole $11. I've seen a couple planes there before, but they always had a piece missing, or a broken tote or something. This time, I could tell right away this plane would be worth every penny of $7! There was some surface rust, the totes were worn and there was some scratched up paint, but beyond that it was in excellent shape! But I couldn't find any branding, so I thought it was just some old, generic plane.
Anatomy of a Bench Plane
But before we get too far into this, I just wanted to provide a little anatomy chart for the bench plane, just like I did in the post about refurbishing Dad's Stanley Bailey plane back in February. Feel free to refer back to this little chart as needed. See how courteous I can be?

Assessing the Condition
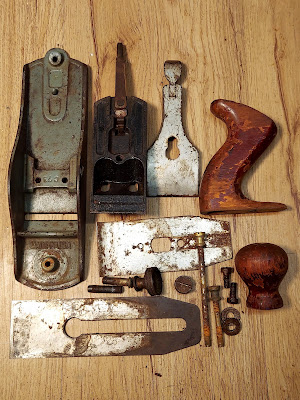
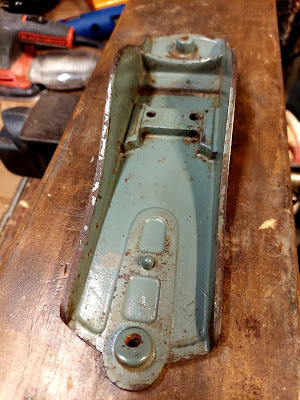
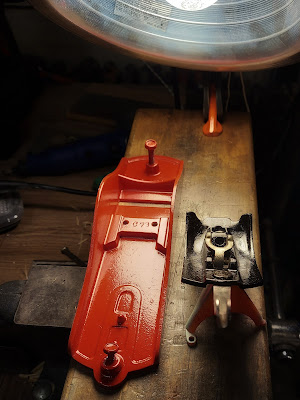
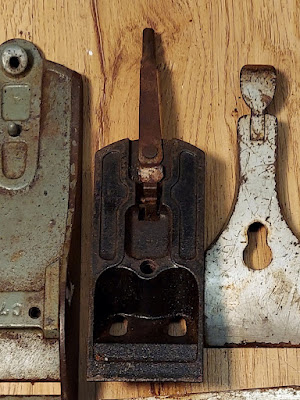
It didn't take me long to get started on this little beauty. Obviously, the first step was to break it down so I could make a good assessment of the components and their condition. I liked the color of the body, a kind of blue-green, very reminiscent of the 1950's. Little did I know, this color would end up being an aide in identifying the brand. But we'll get to that.
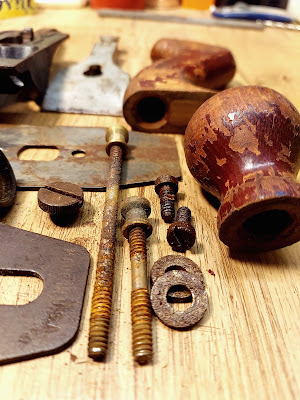
This closer view starts to give you a sense of the overall condition, including the rust and worn out tote and handle. It seems a strange spot to have rust on the screws, and it was pretty thick for being on a screw. Clearly this one was going to take a little work, but I didn't find any significant problems.
Discovery
Like I said, I liked the color but the paint was too badly damaged to try to preserve it, so it had to be removed. I've had good luck with Citrus Strip, and I had some on hand so...
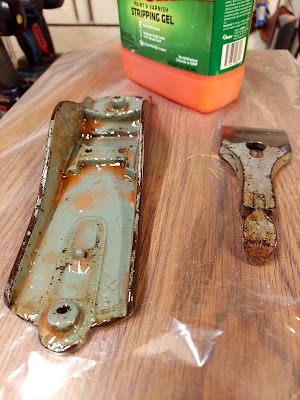
I let the stripper sit overnight, which made the paint removal incredibly simple! A couple rags and some soap and water later, and there sat a clean slate!
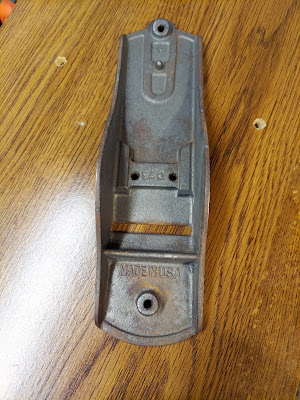
And it was at this point that I noticed a little marking...

See it? It says "C73". I thought it was just a part number but I Googled it anyway, and guess what? It was more than a part number - it was a model of plane built by Stanley - the Defiance. I don't know about you, but I'd never heard of the Defiance line of tools. Once again, I'm discovering how very little I know about tools!
The real story isn't about restoring an old plane. It's that I discovered Stanley intentionally made a line of tools for people who couldn't afford their premium offerings.The Defiance line was built for farmers, homeowners, and ordinary folks trying to get things done during difficult times. In many ways, that fits House 173 perfectly. The house itself has always been about practicality over perfection, making do, improving what you have, finding value in secondhand things, and taking pride in honest work.The Bailey planes may have been Stanley's aristocrats. The Defiance was built for people like us.And maybe that's why this little $7 plane feels so right at home at 173.
What Was Stanley's Defiance Line?
For over 150 years Stanley made some of the best and most popular tools in the US. As the Great Depression grabbed hold of, well - the world, Stanley created a line of less expensive tools for farmers and those who needed tools for working around the house rather than craftsmen. Essentially, they created consumer grade tools for DIY-ers! The Defiance line of planes were produced between 1929 and the early '60s.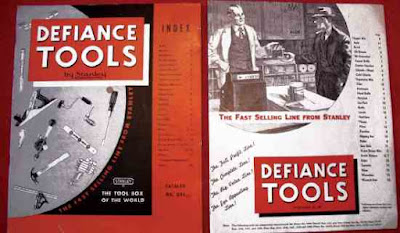
The farmer liked the Defiance line because it offered quality tools at prices up to 30 percent less than other Stanley tools. The initial cost was lower and if the tool was lost or destroyed, it was not as big a loss. - George Wanamaker, in Farm Collector
First Painting
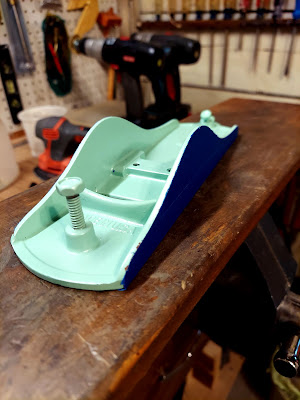
Don't worry, that'll make sense in just a few minutes. After stripping the paint, and doing an initial shining of the plane body with the wire wheel and several grits of sandpaper, it was time to paint! Of course, I first taped off the sides...
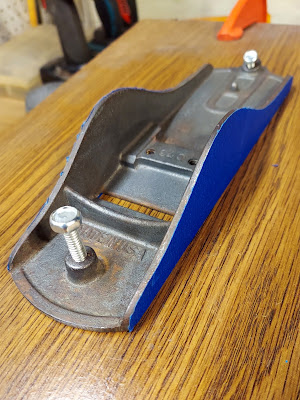
Then a quick coat of Rustoleum primer. I love this stuff because it dries so quickly. The only problem is I'm spraying in the basement, and it's December...in the Northeast, so I definitely ended up killing a few of the" little gray cells."
I wanted to get as close to the original color as I could, which I really should just stop doing. I clearly don't have an eye discerning enough to even come close. I mean, in all my years I've never come close! And such was the case this time too. I wanted that kind of '50s blue/green but I ended up with this...
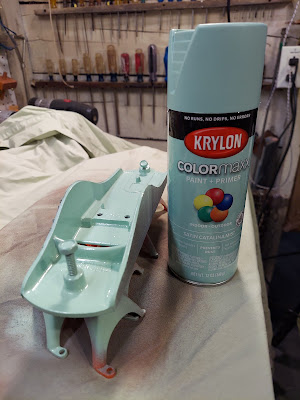
Catalina Mist
Let's be clear: What it was...
And this was as close as I could get using my (very deficient) mind's eye...
Posts about, or involving planes...
∙ Plane Sharpening and Just Plain Rambling - May 2020
∙ Refurbishing Dad's Plane - February 2021
∙ Made at 173: Hand Plane Rack - March 2020
∙ The Dining Room Built-In: The Base - November 2017
⎯⎯⎯⎯⎯⎯⎯⎯⎯⎯⎯⎯⎯⎯⎯⎯⎯⎯⎯⎯⎯⎯⎯
You might also enjoy some posts about flowers!
Second Painting
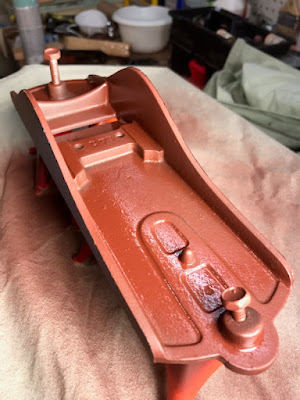
Told you that last subtitle would make sense in a few minutes! I lived with that hideous Catalina Mist color for a couple days. Wait, let me say this first, the Catalina Mist wasn't a horrible color, just the totally wrong color for the plane. After looking upon its hideous visage for a couple days, I knew exactly what I was going to do - repaint it with 173's signature color: Krylon's Cherry Red!
I should have just gone with that from the beginning!
Dressing Up the Frog
When I bought this plane, the frog (see the anatomy chart above!) was all black. While it's not a terrible look, it was a little boring:
So I decided to spice it up a bit, as much as one can spice up a plane frog! I took the old paint off the raised parts of the frog face, then repainted the recessed portions and the back of the frog by hand with some decanted Rustoleum.
Restoring the Tote and Knob
After scraping both pieces with a razor blade (such a quick and easy way to remove old varnish!), I stained them with General Finishes' Georgian Cherry, like I did with my Rummage Sale find of a Great Neck back saw.
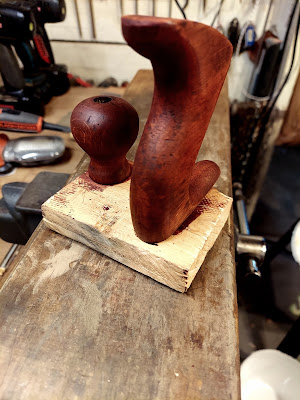
One coat of amber shellac was enough to give it a protective coating, with the added benefit of mellowing the cherry color!
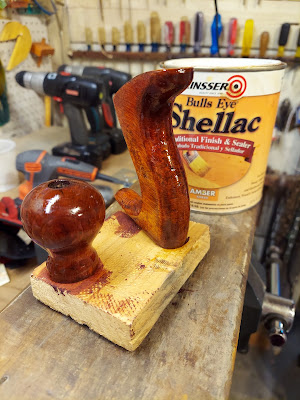
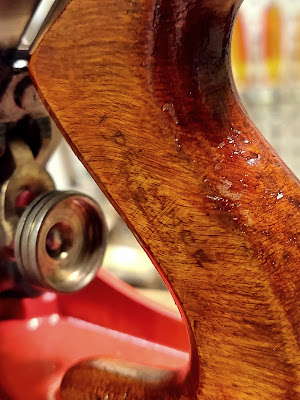
And, if you look closely, you can see the word, "Defiance" on the tote. Maybe one day I'll have developed the skills to enhance and restore the letters, but for now they're at least preserved.
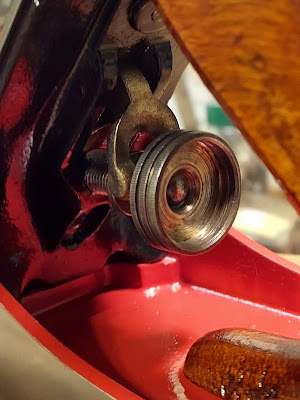
Here's a closer look at the depth adjustment wheel. Originally, it was a brass color so I thought is was brass like the wheel on my Stanley Baily No. 4, but cleaning it up removed the color and it's steel.
I mulled it over for awhile, and considered dry brushing some brass-color paint on it, then it dawned on me - this plane is old, it isn't fancy, and it is what it is! The depth adjustment wheel looks just as nice in natural steel!
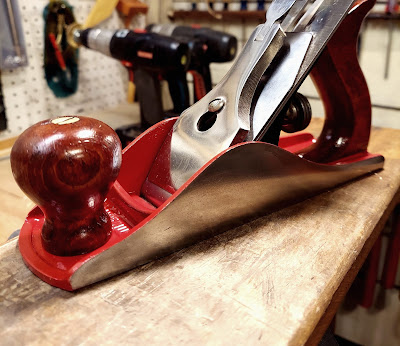
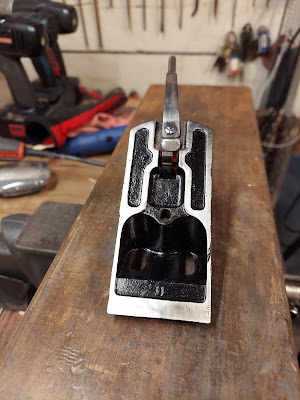
And That's It!
It seems I no sooner started this little project and it was done. For some reason, in my head I imagined refurbishing this plane would take longer than it did. And yes, the Defiance line wasn't Stanley's top-end collection of tools, but I like the way this one turned out in the end (after I covered that green!). Let's check out some glamor shots...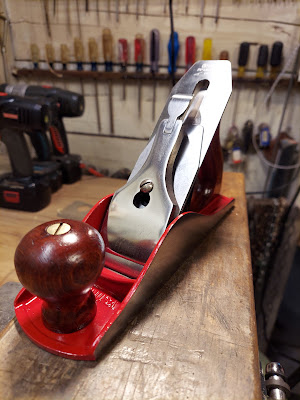
And I do my little turn on the catwalk...

And strut...

Before and After
And a little before and after...

So, that's it. The final post of 2021. Let's all pray 2022 gets better than these last two years! And with that...
Happy New Year Everyone!

Frequently Asked Questions
What is a Stanley Defiance plane?
The Defiance line was Stanley's budget-friendly series of hand tools aimed at farmers and homeowners rather than professional craftsmen.
When were Stanley Defiance planes made?
Stanley produced Defiance planes from approximately 1929 through the early 1960s.
Are Stanley Defiance planes any good?
Yes. While simpler than Stanley's premium Bailey line, Defiance planes are solid users and remain popular among collectors and woodworkers.
What does "C73" mean on a Stanley plane?
The C73 designation identifies a specific Stanley Defiance plane model.
Are Defiance planes collectible?
They are increasingly appreciated for their historical significance and practicality, though they generally remain more affordable than Bailey planes.
Should I repaint an old hand plane?
Opinions vary. Some collectors prefer original finishes, while users often choose restoration and repainting to preserve usability.
What finish should I use on plane totes?
Shellac is a traditional and attractive finish that provides modest protection while enhancing the wood grain.
How do you remove old paint from a hand plane?
Many restorers use paint strippers such as Citristrip followed by cleaning and light abrasion.
Can a budget vintage plane still perform well?
Absolutely. Proper sharpening and setup matter more than price alone.
Why restore old tools?
Because they combine craftsmanship, history, usefulness, and the satisfaction of preserving something worthwhile.
Why save a "lesser" tool?
Sometimes the tools built for ordinary people tell the most interesting stories.
Keywords
Stanley Defiance plane restoration, Stanley Defiance plane, Stanley Defiance C73, Stanley Defiance C73 plane, Stanley bench plane, vintage Stanley plane, hand plane restoration, bench plane restoration, restoring old tools, Stanley Defiance tools, vintage woodworking tools, Stanley hand plane, DIY woodworking tools, vintage hand tools, tool restoration, House 173