

A Great Rummage Sale Find!
A rusty rummage sale find becomes one of the handiest saws in the workshop.

Understanding a Backsaw
I hear the terms all the time - dovetail saws, tenon saws, carcase saws, backsaws and more. The truth is, each of those examples are backsaws, backsaw being the category of saw I suppose. Basically, a backsaw is a handsaw with a wide blade and a reinforced back edge that ensures the blade remains straight during cutting. Most backsaws have crosscut teeth, which we discussed a bit when I wrote about salvaging a rip saw. Backsaws are generally used for simple cutoff work, and I usually use my backsaw for cutting molding in a miter box, although I've found myself using it more often for small crosscut jobs.
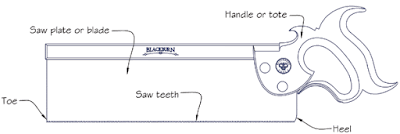
One of the things I appreciate most about a backsaw is its precision. When a circular saw feels like overkill and a full-size handsaw feels a little clumsy, a backsaw is often just right. Whether trimming a small piece of molding, fitting a woodworking joint, or making a careful cut that needs to stay square, it's one of those quiet little tools that earns its place by making accurate work feel easy.
A Little Great Neck History
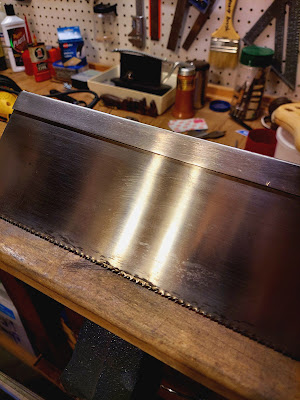
Not that it matters much, and really, in the end it doesn't matter at all, but this is my first Great Neck tool - kinda. I say kinda, because Great Neck actually makes hand tools for Home Depot, Lowes, Buck Brothers and others. It's always fun to learn who actually makes the tools for some of these companies. It's also nice when we can have some things made in the USA! So, here's a look with the branding still on the blade. Cleaning and polishing the blade will certainly remove that little bit of ink announcing the manufacturer.
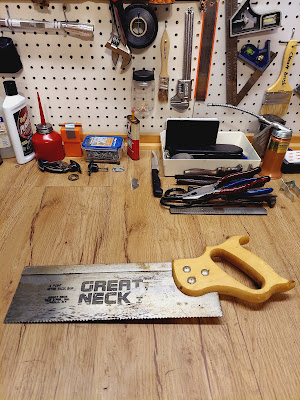
In 1919, Samuel Jacoff, a tool and die maker living in Pittsfield, MA, started a hacksaw blade manufacturing business with the help and support of his wife Sarah. When fire destroyed their building in 1929, they merged with another blade maker, Great Neck Manufacturing. In 1941, they purchased a handsaw company and constructed a new plant in Mineola, NY where they remain today. - Great Neck Tools website
A Pleasant Surprise
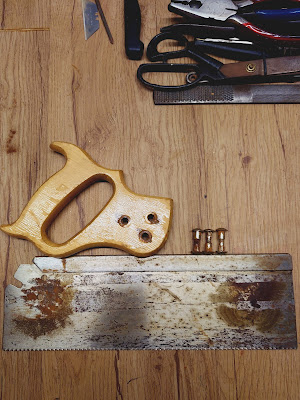
Taking saws apart are the easiest thing in the world - a few screws and that's it. This saw turned out to be in okay shape, especially compared to the rip saw I did a couple weeks ago. The rip saw was badly rusted and the handle had some rot, but this saw was pretty clean in comparison. The blade was in decent shape and the handle was in excellent condition:
Sharpen First, Restore Second
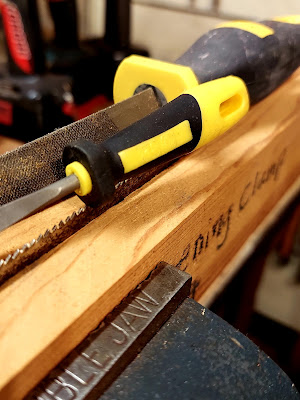
Just a quick step back. Before I took the saw apart, I decided to test the saw, and it turned out the teeth were pretty dull. Fortunately, I was able to secure it in my saw sharpening clamp I made back in 2017. It only took about ten minutes of filing to get the teeth back in shape.
Cleaning the Blade
A quick look at this blade just shows minor rust and that it's a little dirty. But the dirty part was a bear to clean. It was some kind of goo that took some serious elbow grease to remove. But after a few grits of sandpaper and some polishing compound, the blade came out pretty good, leaving a minimal amount of staining from surface rust...
Giving the Handle Some Character
There's absolutely nothing wrong with the blonde handle for this saw, but the varnish on it was gatoring and flaking off. So I took a razor blade and scraped it all off - only took maybe 15 minutes.
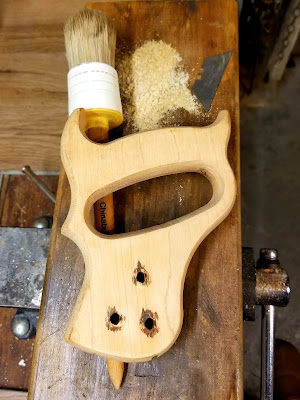
The wood was in excellent shape, but I'm terrible at identifying wood species. The best I can tell, the handle is pine, but I'm not sure they make saw handles from pine. Every website I visited simply described the handle as being "made from hardwood" but never mention what species. I guess I'll just go with a pine-looking hardwood until I learn differently!
The thing is, hardwood or not, the handle was waaaay too plain for my liking. This saw, not being a collectible antique, was about to have a significant change. I decided to go with General Finishes Georgian Cherry as the base. It's a striking color...
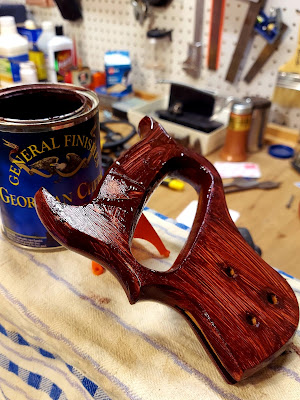
But that wasn't the end of the plan, only a part of the master plan! To get to the color I wanted, I applied two coats of amber shellac, and wound up with the color I had in my mind's eye...
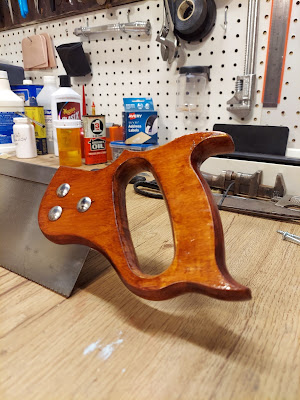
I just noticed I skipped a step, so I'll squeeze it in here. The rivets weren't in bad shape, but they were scuffed and had a smidge of rust on them. So I soaked them in vinegar for a couple hours and polished them up with some metal polish and the rotary tool.

Then it was about 45 seconds of reassembly and the saw was finished!
Drum Roll Please!
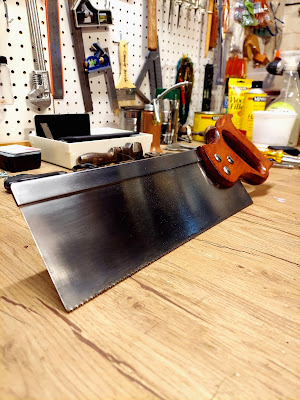
A few stains left on the blade but newly sharpened and dressed up with a snazzy looking (totally subjective opinion!) handle and mirror-finished rivets. And here she is.

Sure, this was a really simple project, with no more than an hour-and-a-half of work involved, but my Great Neck backsaw is now positioned to long outlast me! My little $1 saw has got to be worth close to the price of a new backsaw - about $20. But that doesn't matter as much as the fun of cleaning these things up, sometimes these simple projects are just what the doctor ordered! Can't wait for the next project that needs a backsaw. Heck, I just might conjure up a project just to use this little beauty.
Thanks for stopping by!

I don't think restore old tools.In fact, before reading this, I probably would've walked right past that saw at the rummage sale without giving it a second glance.What I liked was that you never tried to convince me it was some rare collector's item. You admitted it wasn't. That actually made the project more interesting because it became about usefulness instead of value.The handle transformation surprised me the most. I expected the polished blade to steal the show, but once you added the stain and shellac, the whole saw suddenly looked like something I'd actually want to pick up and use. It still looked old, just cared for.I also appreciated how approachable the restoration felt. There weren't any exotic techniques or expensive equipment, just careful cleaning, sharpening, and patience. By the end, I found myself looking around my own garage wondering what forgotten tool I've overlooked simply because it looked tired.That's probably the biggest compliment I can give this post: it made me want to rescue something instead of replace it. - The Weekend DIYer Who Doesn't Restore Tools
Frequently Asked Questions
What is a backsaw used for?
A backsaw is designed for accurate, controlled cuts where precision matters more than speed. Its reinforced spine keeps the blade rigid, allowing it to make straighter cuts than a standard handsaw. Backsaws are commonly used for trimming moldings, cutting joinery such as tenons and dovetails, fitting small parts, and working with miter boxes.
Can an old rusty saw be restored?
In many cases, yes. Surface rust, dull teeth, worn finishes, and tarnished hardware are all common issues that can often be corrected with careful cleaning, sharpening, and refinishing. As long as the blade isn't badly pitted or bent and the handle is structurally sound, an older saw can often provide decades of additional service.
Should you refinish an old saw handle?
That depends on the saw. Valuable antique saws are often best left as original as possible, while common user-grade saws can be refinished to improve comfort and appearance. In this restoration, the new stain and shellac transformed a plain handle into one with much more warmth and character while preserving its functionality.
Why sharpen a backsaw instead of replacing it?
A quality backsaw can last for generations if properly maintained. Sharpening restores cutting performance without sacrificing the original tool. Learning to sharpen hand saws is also a valuable woodworking skill that can keep older tools working like new.
Why restore inexpensive tools?
Restoration isn't always about increasing monetary value. Many inexpensive vintage tools were built to higher standards than some modern equivalents. Cleaning, sharpening, and preserving them keeps useful tools out of landfills while providing the satisfaction of bringing something neglected back into everyday use.
Keywords
Great Neck backsaw, backsaw restoration, vintage backsaw, hand saw restoration, saw sharpening, woodworking hand tools, Great Neck tools, restoring old saws, woodworking restoration, House 173